Automation Types
Nearly every parameter in Fender Studio Pro can be automated. Several ways to automate parameters are provided, including Track automation, Automation Tracks, and Part automation. The following sections describe these automation types.
Track Automation
Track automation allows you to automate any parameter related to an Audio or Instrument Track and the Events it contains. Automation can be viewed via the Show Automation button at the top of the Track Column in the Arrange view or by [Right]/[Ctrl]-clicking on a Track and selecting "Expand Automation." Note that for Instrument Tracks (which do not have automation enabled on any parameters by default), Expand Automation does not show automation unless one or more parameters have been enabled for automation.
Note that automation curves on Instrument Tracks control the parameters of the virtual instrument to which the Instrument Track is routed. All other aspects of Instrument Track automation curves work in the same way as with Audio Track automation.
Automation Curves On the Track

To view automation curves one at a time, superimposed on top of Events on the Track, Press [A] on the keyboard or click on the Show Automation button at the top of the Track column in the Arrange view. With this engaged, the Track column of the Arrange view changes to reveal automation parameters, including an On/Off button, the parameter name for the currently shown curve, and automation mode selection.
Click on the Automation Parameter display, which is labeled “Display: Off” by default, to reveal the available automation curves for a Track (“Display: Off” indicates that the Events on the Track are displayed, instead of an automation curve). Volume and Pan automation curves are available by default on every Audio Track. Select a parameter from the list to view and edit the automation curve, or click on Add/Remove to open the Automation dialog for the Track.
Automation Curves In Lanes
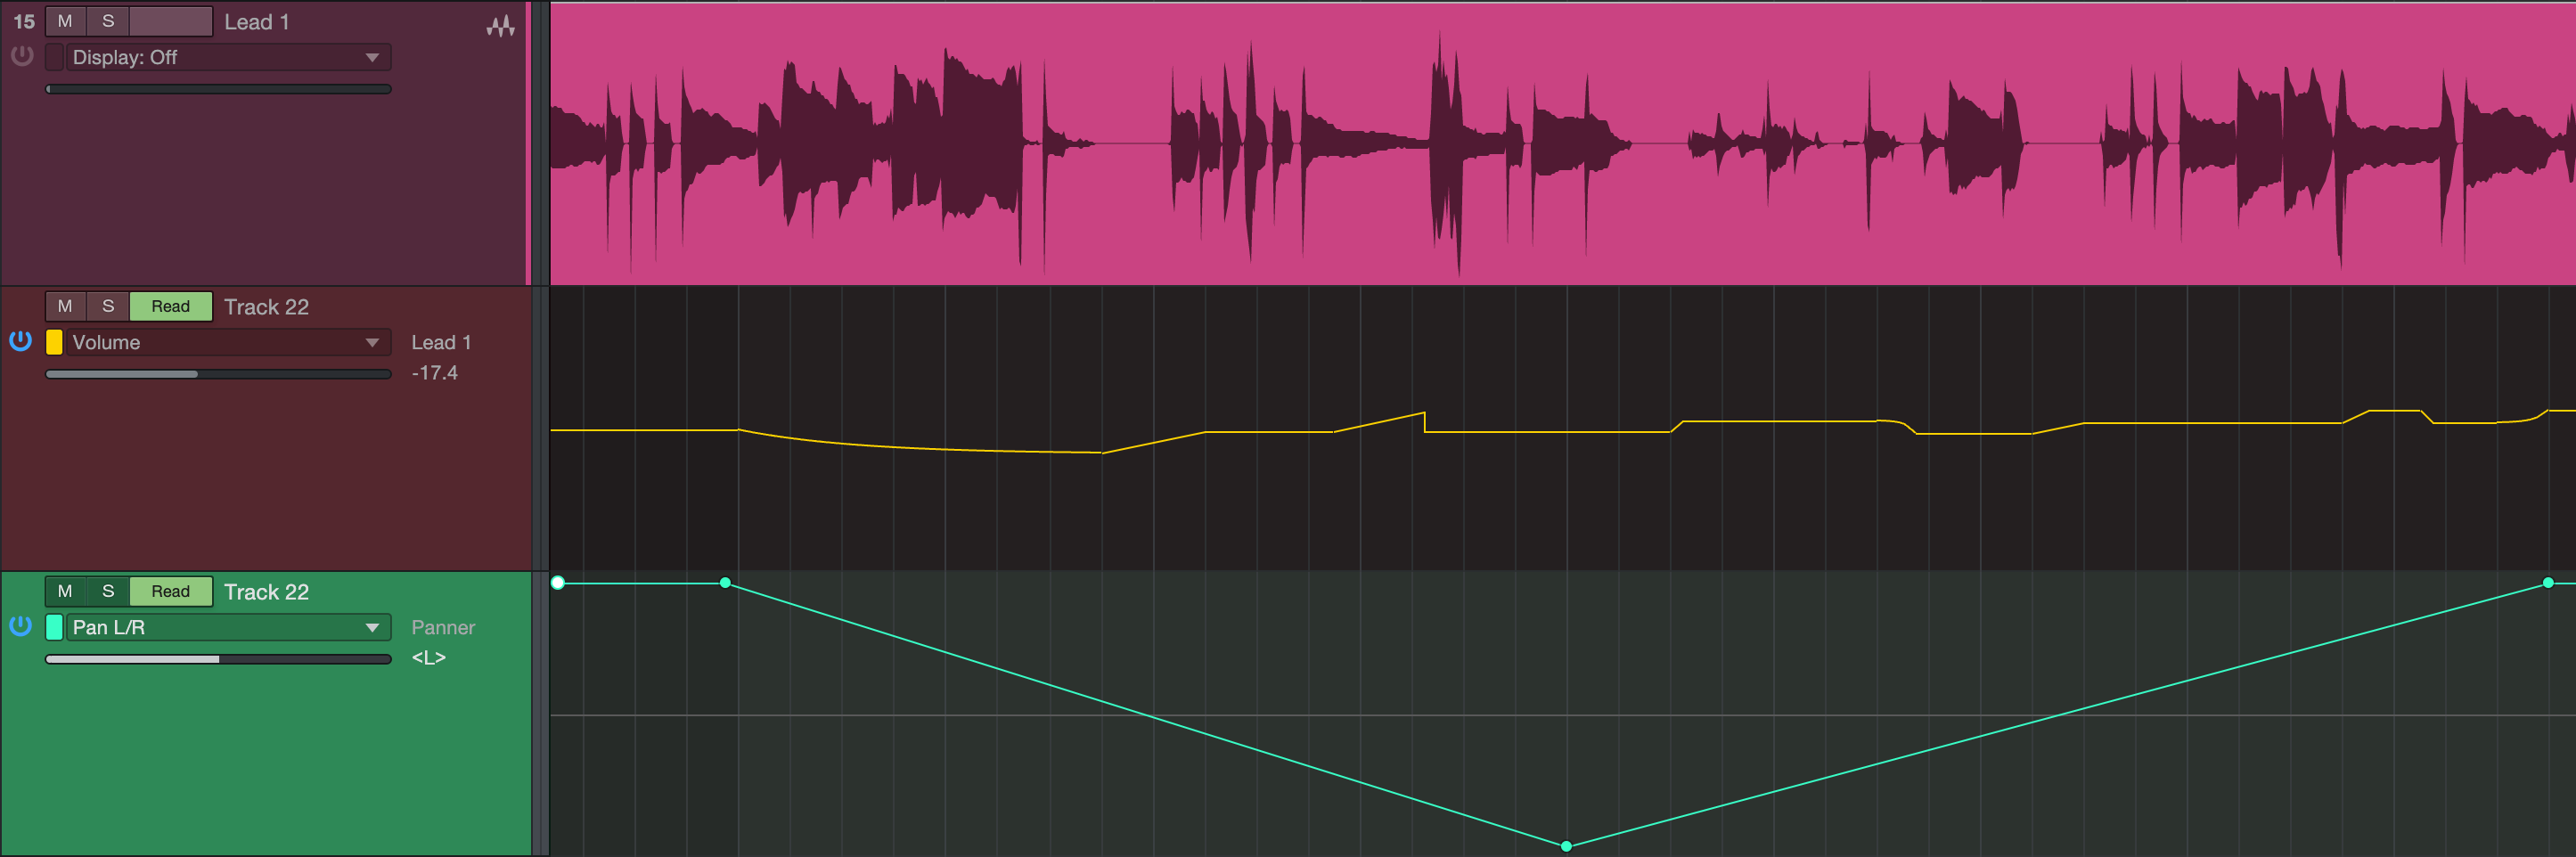
To view multiple automation curves at once, with each in a lane under the Track, [Right]/[Ctrl]-click on a Track and select "Expand Automation." Alternatively, you can click the drop-down arrows for a Track in the Track List to expose its automation curves in the same way. To hide the automation curves, deselect Expand Automation in the Track contextual menu.
Turn Automation On/Off
Automation curves can be turned on and off, so you can decide when they affect the controlled parameter. To turn an curve on or off, click on the On/Off button for that curve. Each automation curve can be turned on/off independently. Turning an automation curve on/off during playback has different results depending on the current Automation Mode for the Track.
Add Automation Curves to a Track
Any number of automation curves can be added to a Track. The fastest way to add an automation curve to a Track is as follows:
- Modify any parameter for an Track or its Inserts or Sends, and that parameter is displayed in the Software Parameter window in the far left of the Arrange view toolbar in the Session window.
- Click on the Hand icon in the Software Parameter window, and drag it to the Track to add an automation curve for that parameter to the Track. If the curve already exists, it is displayed, and a new curve is not added.
An alternative way to add automation curves to a Track is described as follows:
- Press [A] on the keyboard to show automation.
- Click on the Parameter window on the Track in the Track column of the Arrange view and select Add/Remove from the list. This opens the Automation dialog for that Track:
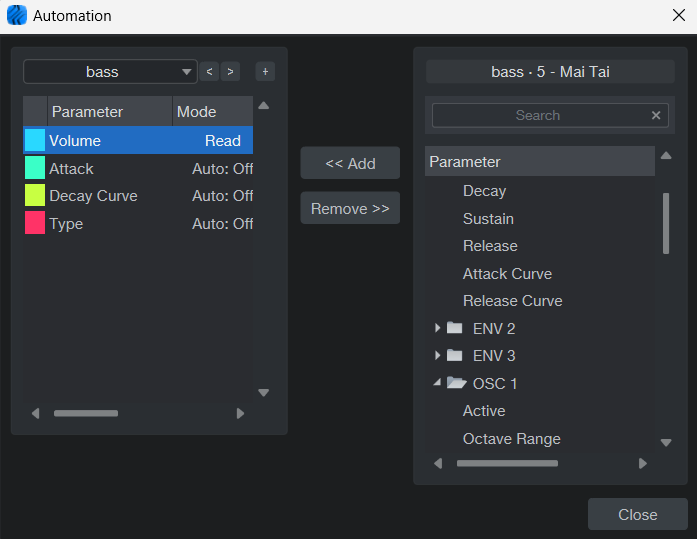
At the top left of the Automation dialog, you can browse through all Tracks in your Session to view and edit the automation curves for any Track. You can also click on the "Add Automation Track" button to add a new Automation Track.
On the left side of the Automation dialog, the existing automation curves are listed, along with their associated automation mode and device. On the right side of this dialog are the parameters for which new automation curves can be added. The automation dialog has a search bar as well. Once you find a parameter you would like to automate, select the chosen parameter and click “<<Add” located in the middle of the Automation dialog. This will add the parameter to the list of Automation Tracks.
Select any parameter on the right and click “<<Add” to create a new automation curve. Click on any parameter on the left and click “Remove>>” to remove the existing automation curve.
Automation Tracks
Fender Studio Pro features a Track type dedicated to automation that only contains automation curves. An Automation Track can contain automation curves related to any Track and any plug-ins. To add an Automation Track, press [T] on the keyboard to open the Add Track dialog, and select Automation. Note that at least one curve on Automation Tracks is always visible, and the curves can be viewed on the Track itself or in lanes, just as with the other Track types.
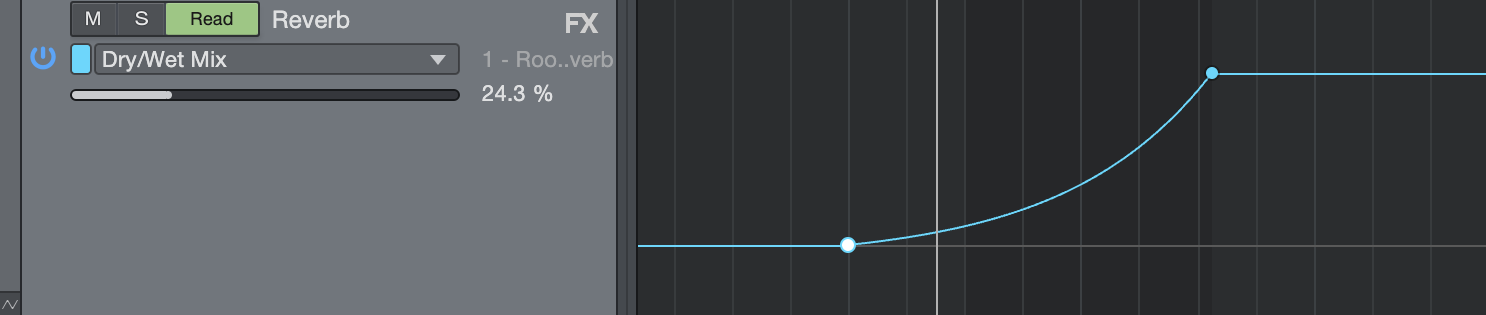
Only those parameters for which an automation curve does not already exist are available for automation. However, you can drag and drop an automation curve from any other Track to an Automation Track. All other aspects of Automation Track automation curves work in the same way as with Track automation.
You can use Automation Tracks to automate Bus, FX, and Output Channel parameters and Inserts and to keep critical automation curves organized in one place and easily accessible.
Clicking the Show Automation option (or pressing [A] on the keyboard) toggles the visibility of Automation Tracks on and off, along with automation lanes associated with audio and instrument Tracks.