SampleOne
A sampler is a bit like a synthesizer. However, instead of generating sounds using oscillators or operators, samplers start with an audio clip, or “sample,” and then play and process that sample based on how the instrument is configured.
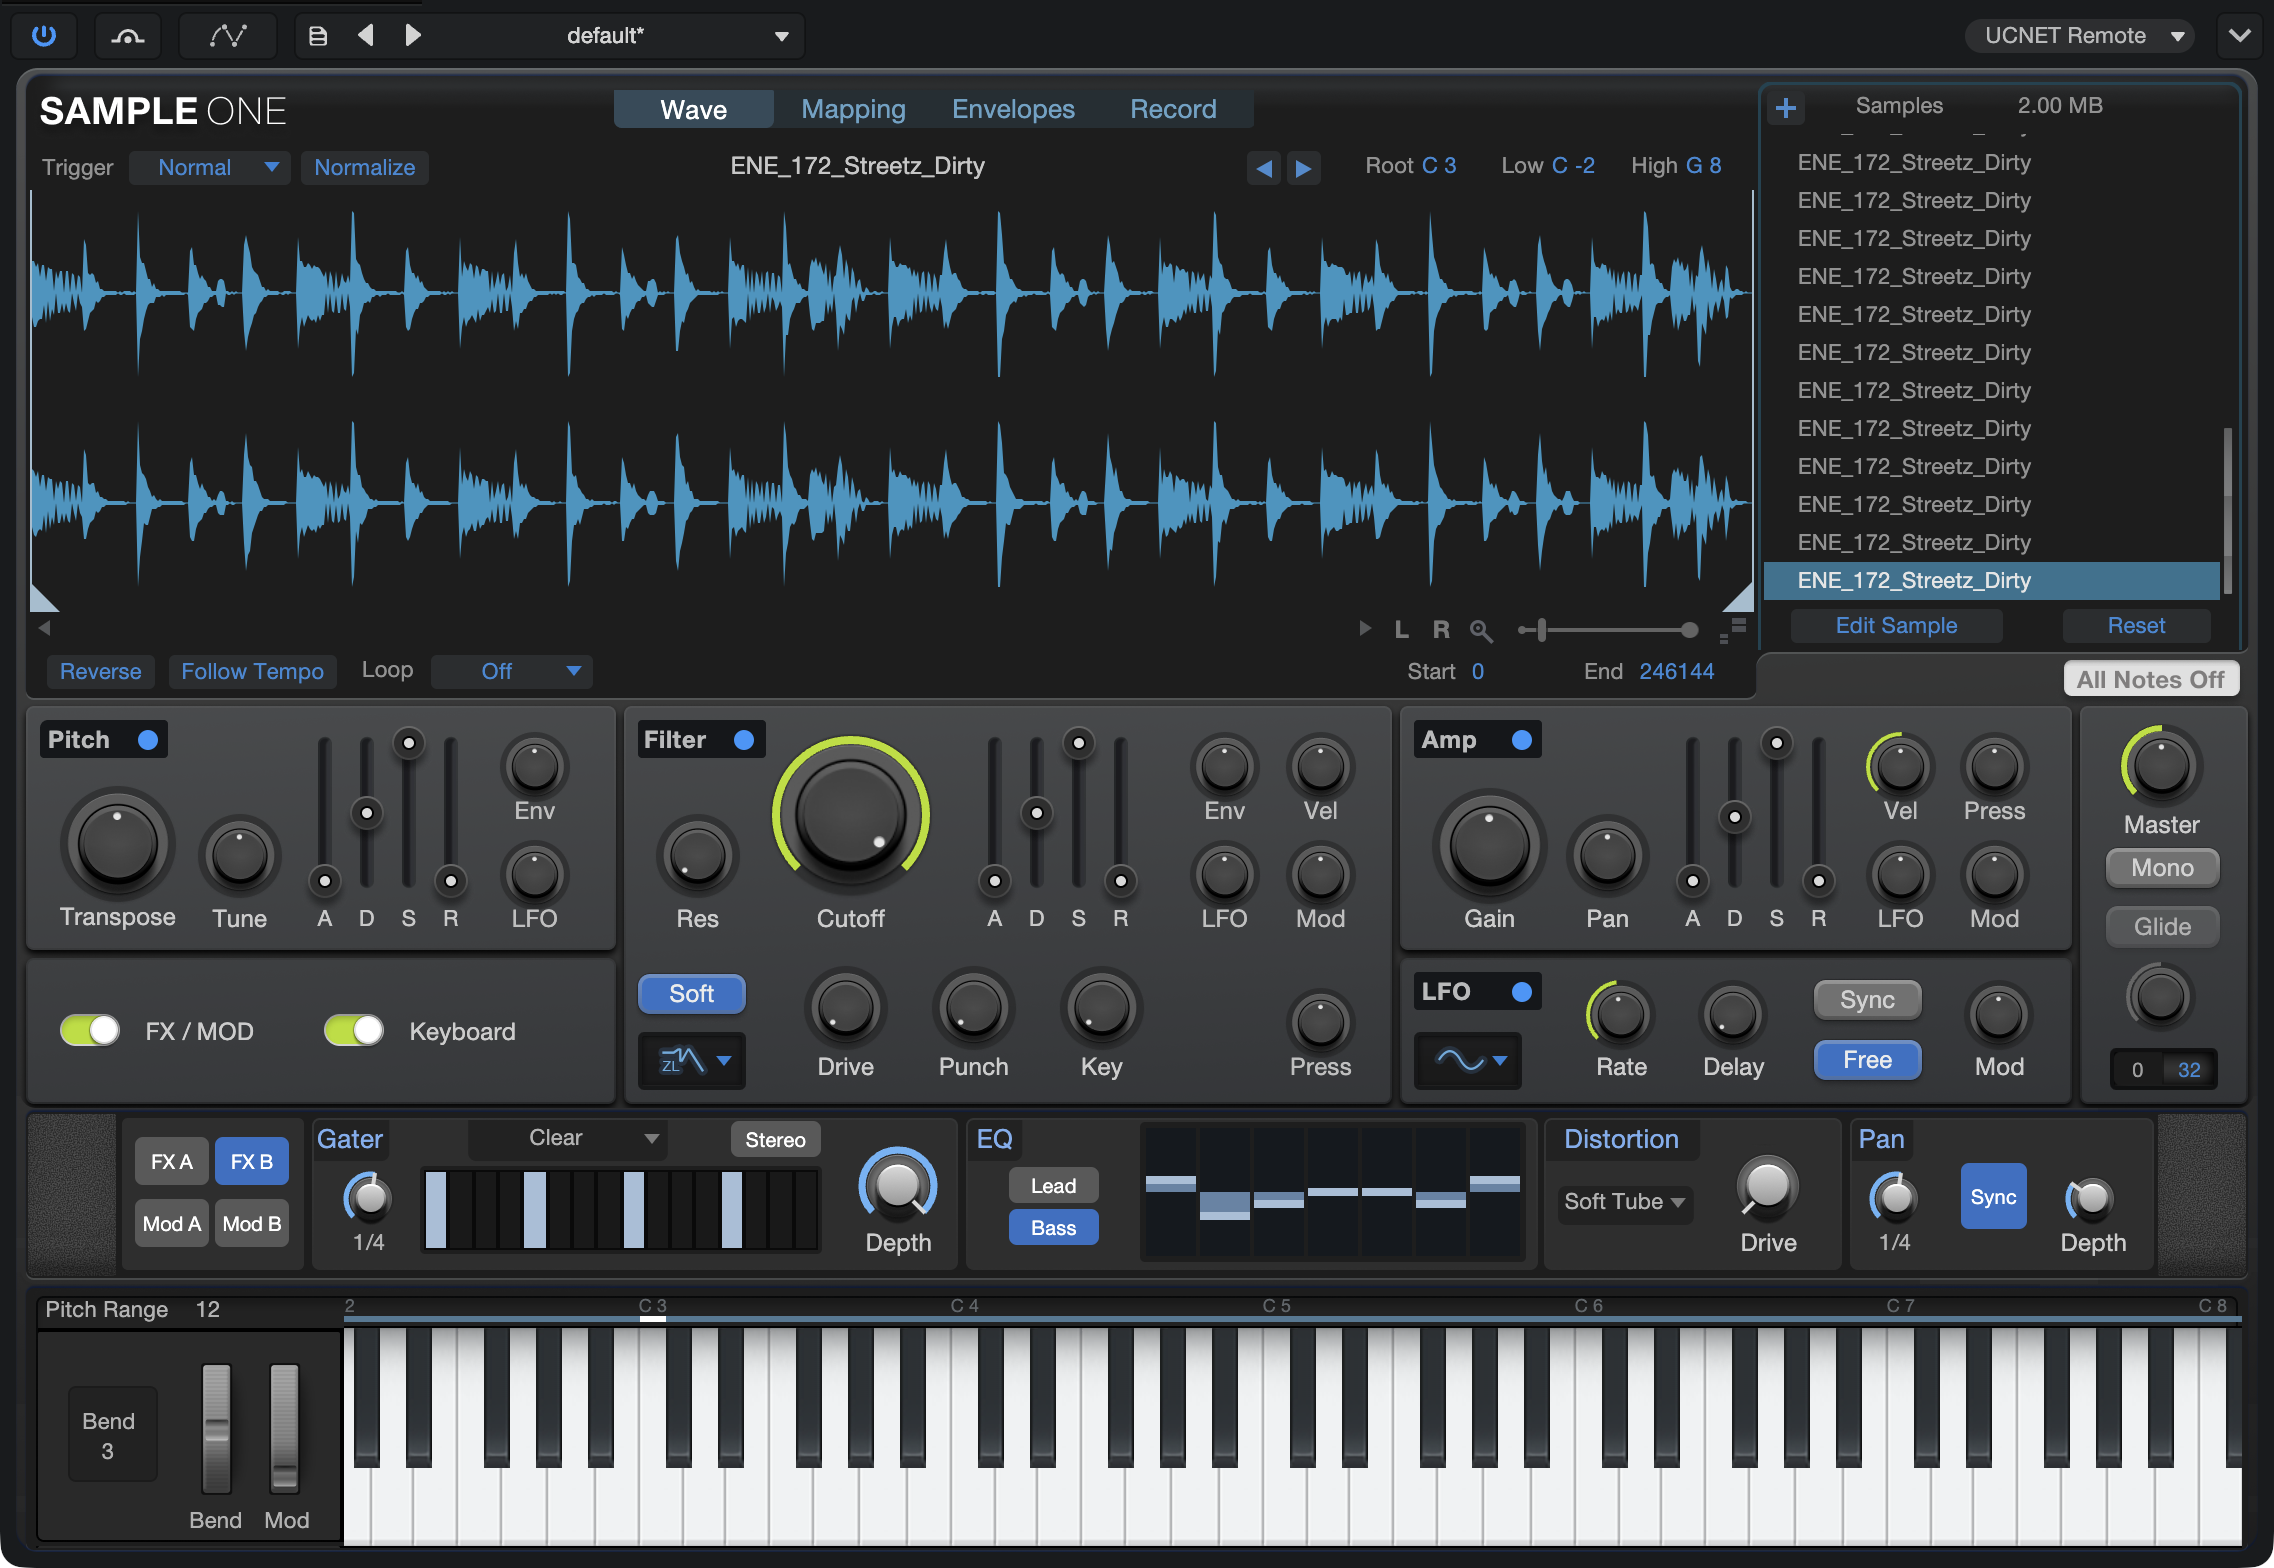
SampleOne is a full-featured sampler that builds on the strengths of our original SampleOne instrument. It features triggered sampling, automatic time-stretching, a full range of tone-shaping tools, and flexible onboard effects. The following section describes how to use SampleOne.
Interface Overview
The main display features four "tabs" along the top, each of which gives you access to a distinct set of tools and parameters:
To the right of the tabbed interface is the Samples list, which shows the samples that make up the current patch. In the lower half of the plug-in interface, you'll see controls for sample Pitch (playback frequency), Filter (tone shaping), Amp (amplitude shaping), LFO (modulation), and effects. Rounding things out are the global settings in the Master module, and a playable onscreen keyboard.
Wave View
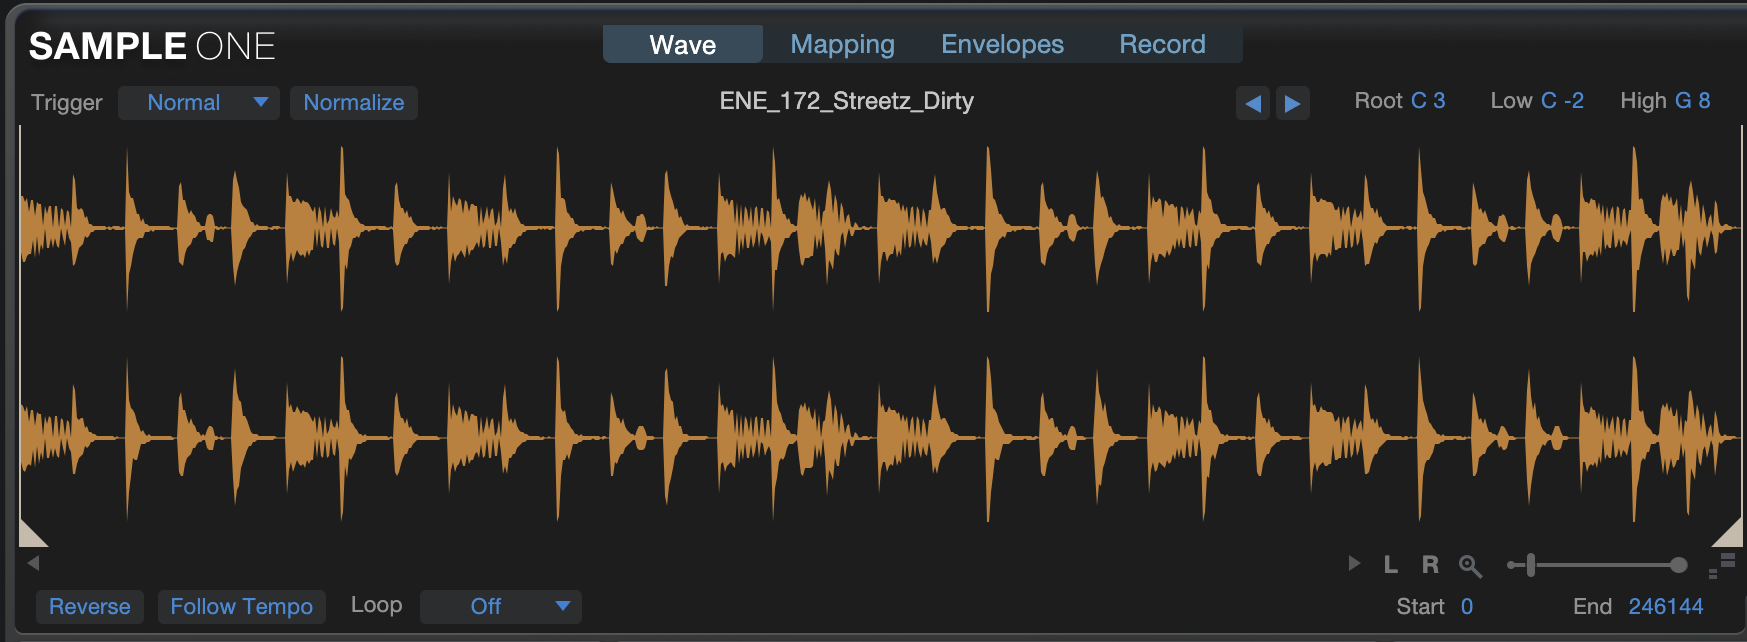
Wave view is where you do the bulk of your sample and loop editing. To select the range of the sample that plays when you trigger it, click-and-drag the blue triangles below the waveform.
Fades are displayed and edited in a similar way as with audio events on a track. To create a fade-in or fade-out, click-and-drag left or right on the Fade Flag in the upper left or right corner of an Audio Event. Fade handles are only visible when the mouse is over the waveform display. When fades and a loop crossfade overlap, the crossfade always has priority, and as long as the sample loops, the manual fade is suppressed.
Above the waveform, you can adjust the following features:
-
Trigger: Open the Trigger menu to choose the method by which to play the currently selected sample, from the following choices:
-
Normal: In this mode, the sample starts playing when you trigger it, and stops when you let go of the key (or when the recorded note that triggers it ends).
-
One Shot: In this mode, the sample plays through in its entirety when triggered. This is often used for drum sounds.
-
Toggle: In this mode, the sample begins playing when triggered, and stops playing when triggered a second time. This is most useful for loops and continuous, droning sounds.
-
-
Normalize: Enable this option to boost the amplitude of the current sample until its highest peak reaches a point just below full scale.
-
Load Next/Previous Sample in Folder: These buttons let you quickly swap the current sample for its neighbor in the enclosing folder. This allows for quick auditioning of a range of samples, to find just the right candidate.
-
Tempo: The tempo is initialized when “Follow Tempo” is enabled for the first time. The tempo is taken from the file if it contains one. Otherwise, the tempo is guessed from the current length of the sample (start and end marker). If no tempo could be guessed, the tempo field shows “???” The tempo can be re-initialized. To do so, just type “0” as tempo or nothing into the tempo field.
-
Root, Low, and High: These selectors let you set the root note and note mapping for the current sample. You can also set these parameters in the dedicated Mapping view.
Below the waveform, you can adjust the following features:
-
Reverse: Enable this option to reverse the current sample.
-
Follow Session Tempo: Enable this option to automatically timestretch the current sample to fit the tempo of the Session. When “Follow Tempo” is active, you can modify the playback speed by choosing from the following options: Normal, Double, or Half speed. All speeds are based off of the Session tempo.
-
Note: The sample must be tempo-tagged to enable this feature. Timestretched stereo samples will replay in mono.
-
-
Loop: To loop playback of a sample, open the Loop selector and choose a looping mode:
-
Sustain: In this mode, when a note ends, playback continues beyond the selected loop range until the end of the release phase of the Amp envelope.
-
Release: In this mode, when a note ends, playback continues to loop until the end of the release phase of the Amp envelope.
-
Ping-Pong: In this mode, loop playback proceeds to the end of the loop range, then the sample is played in reverse until it reaches the beginning of the loop range, and so on.
-
Note: When a looping mode is selected, the Loop Range bracket appears above the sample waveform, indicating the section of the sample to be looped. If the loop range begins after the initial playback range begins, the sample plays from the beginning of the playback-range position to the end of the loop-range position; then it plays from the start of the loop range to the end of the loop range and back for as long as the sample is triggered.
-
-
X-Fade: Click-and-drag or click and type in this field to specify a number of samples of crossfade to apply to the loop points, to assist in removing audible clicks.
-
Start/End Values: To fine-tune the start-and-end points, you can click-and-drag or click and type a value into the Start and End fields.
Mapping View
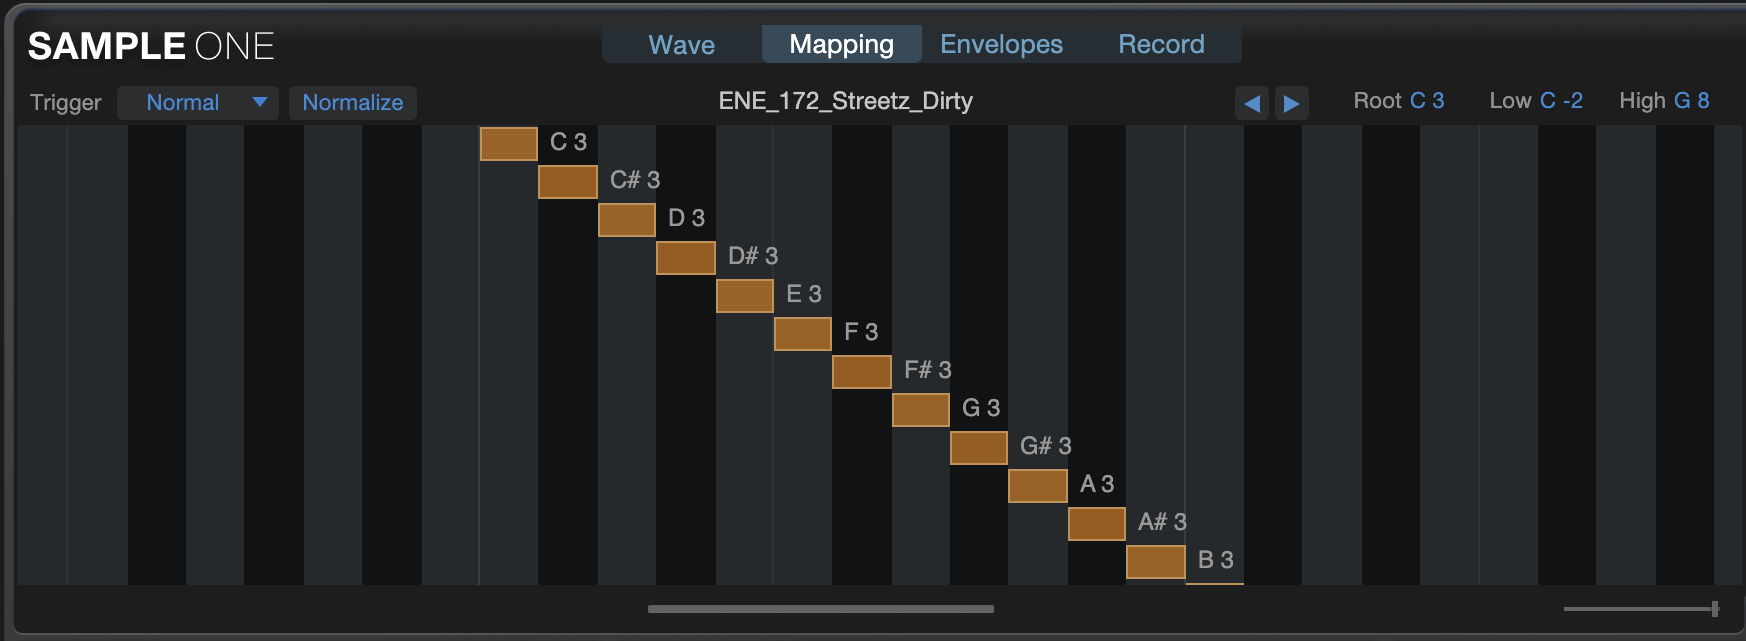
Mapping view shows each currently loaded sample as a Keymap Range selector that occupies a certain range of MIDI notes. The bright mark within each selector shows the current root note of the sample.
To change the root note of a sample, click-and-drag the sample's root-note handle left or right across the keyboard display. The notes on your keyboard that trigger the sample are indicated in the Keymap Range selector, which is the blue bar extending to the right and left of the note handle. To restrict the range of notes that can trigger the sample, click-and-drag the left or right edge of the Keymap Range selector.
Envelopes View
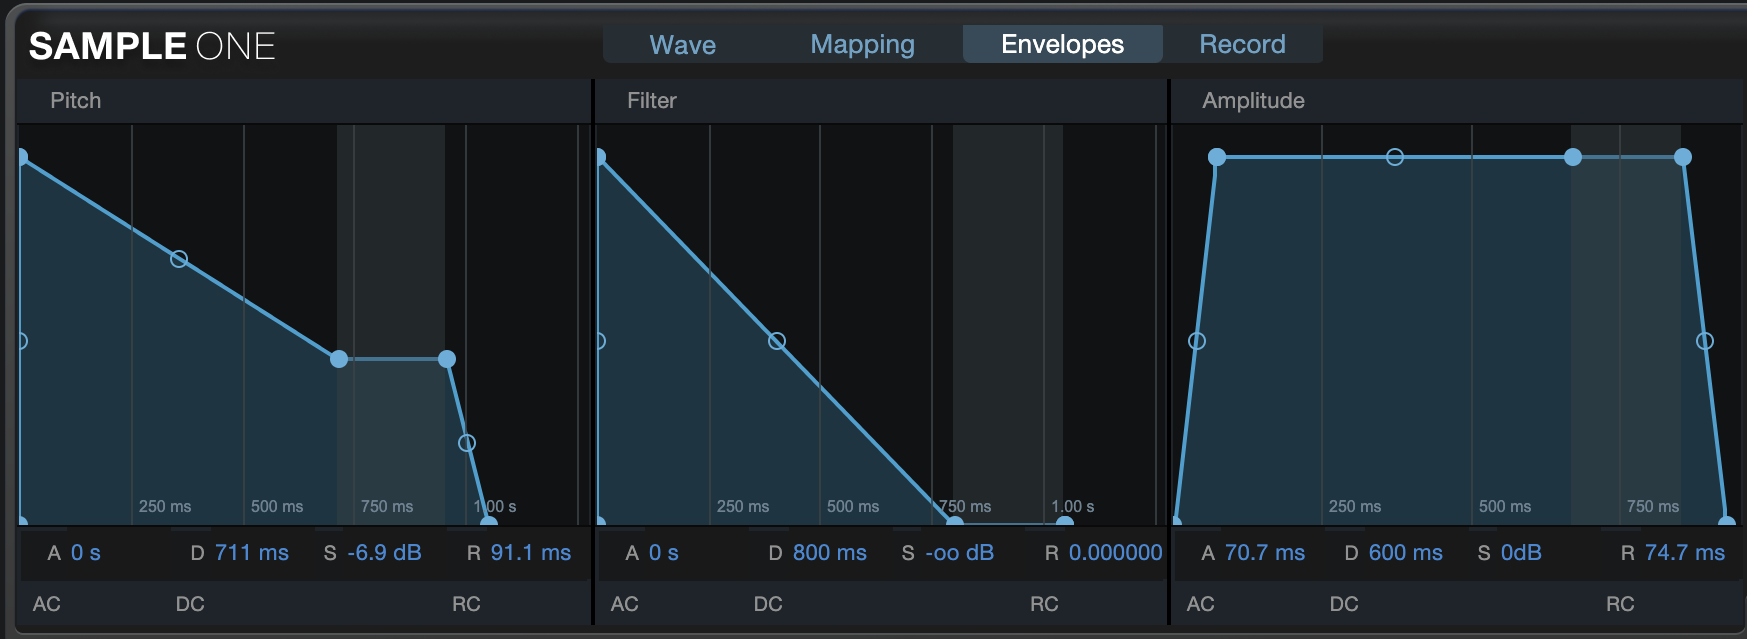
Envelopes view gives you graphical representations of the Pitch, Filter, and Amplitude envelopes that you can freely shape using the mouse. Click-and-drag the handles on each envelope to change the shape. The Attack, Decay, Sustain, and Release values are shown as numeric selectors below each envelope. These can also be changed by click-and-drag or click-and-type. Below them are the curve controls for each applicable envelope value ("AC" for "Attack Curve," "DC" for "Decay Curve," and so on), which let you precisely set the curve of each envelope segment.
Record View
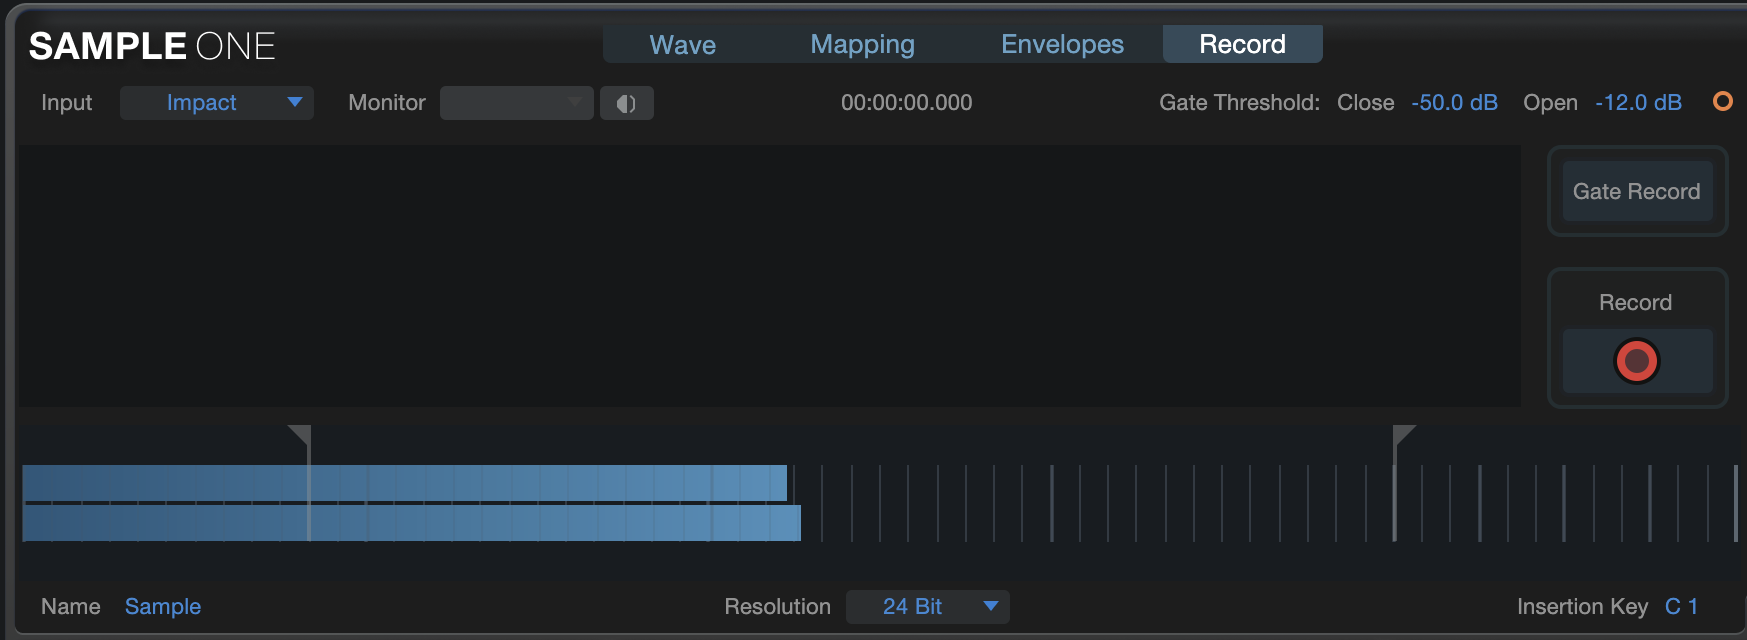
Record view lets you record audio directly into SampleOne, for immediate use as new samples. To do this, first select the Input to record, which can be any hardware audio input, send, output, or Instrument output. The Monitor selector lets you choose which bus should receive the cue signal for monitoring as you record.
There are two main ways you can record:
- Record: Press Record to begin recording immediately. Press the button again to conclude recording. The resulting audio is shown in the Samples list, and is then available for use.
- Gate Record: Press Gate Record to enable amplitude-based recording, in which each distinct region of audio (as specified by the Gate Threshold controls) is recorded as a separate sample. This is a great way to record a set of drum samples, for example.
Gate Threshold: The Open setting specifies the signal level at which recording begins while in Gate Record mode. The Close setting specifies the signal level at which recording ends. You can also set these ranges by clicking-and-dragging the triangle-shaped markers in the signal level display.
Name: This field lets you specify the name of the next recorded sample. If more than one sample is recorded before the name is changed, the samples will share the specified name, followed by a numeric identifier.
Resolution: This selector lets you set the bitrate of the recorded samples.
Insertion Key: This selector lets you choose the initial root note of the recorded samples. If more than one sample is recorded before the Insertion Key is changed, the samples are assigned to the next-higher note each time.
Samples List
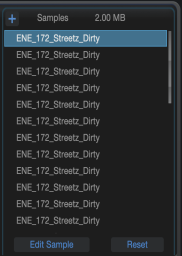
To add a sample to SampleOne, drag any audio clip from the Browser, or any Audio Event or selected range from the Arrange view, into the Samples list. The waveform for the audio clip appears in the main display. If you drag in a selected range from the Arrange view, the range is bounced to a separate audio file and then added to SampleOne.
Note you can quickly access samples that are in the same file location as a loaded sample by using the [Previous] and [Next] button to switch to the previous or next sample in that file location.
By default, the keymap range is set from C0 to B5, with C3 set as the sample’s root note. With the SampleOne instrument Track properly set up, and Monitor engaged, press any key within the default keymap range on your keyboard to play the loaded sample. C3 is set by default as the sample’s root note, so playing the C3 (middle C) key on your keyboard plays the sample at its original pitch and speed. Playing the keys above C3 shifts the sample pitch higher, and playing below C3 shifts the sample pitch lower and slows down playback speed.
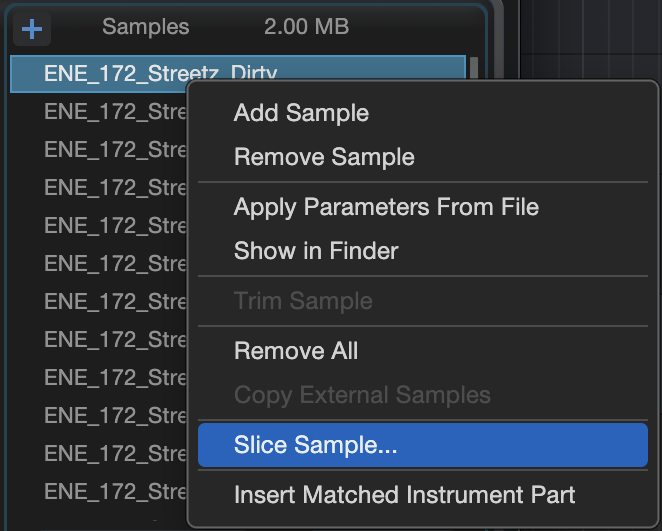
[Right]/[Ctrl] - click onto any of the samples within the sample list to access the sample context menu:
-
Add Sample: Add a sample from your Finder or File Explorer to the sample list.
-
Remove Sample: Remove selected sample file.
-
Show in Explorer: Show location of sample in your computer’s local folder.
-
Create Slices: Extracts slices from loop and places them in the samples list.
-
Trim Sample: Truncates sample, removing whatever is outside of sample start/end range. Note that this is not “destructive,” as a new file is written after selecting Trim Sample.
-
Remove: All Remove all samples from sample list.
-
Copy External Samples: Copies sample files that are not located in the Session folder to the Session folder.
-
Insert Matched Instrument Part: Choosing this option will insert a matched instrument part of the selected sample to the nearest bar position (relative to the cursor position).
Send to New SampleOne Instrument Track
To quickly create a new instrument track with SampleOne preloaded with a sample or loop, [Right]/[Ctrl] - click onto the loop/sample you would like and select the “Send to new SampleOne” option from the context menu:
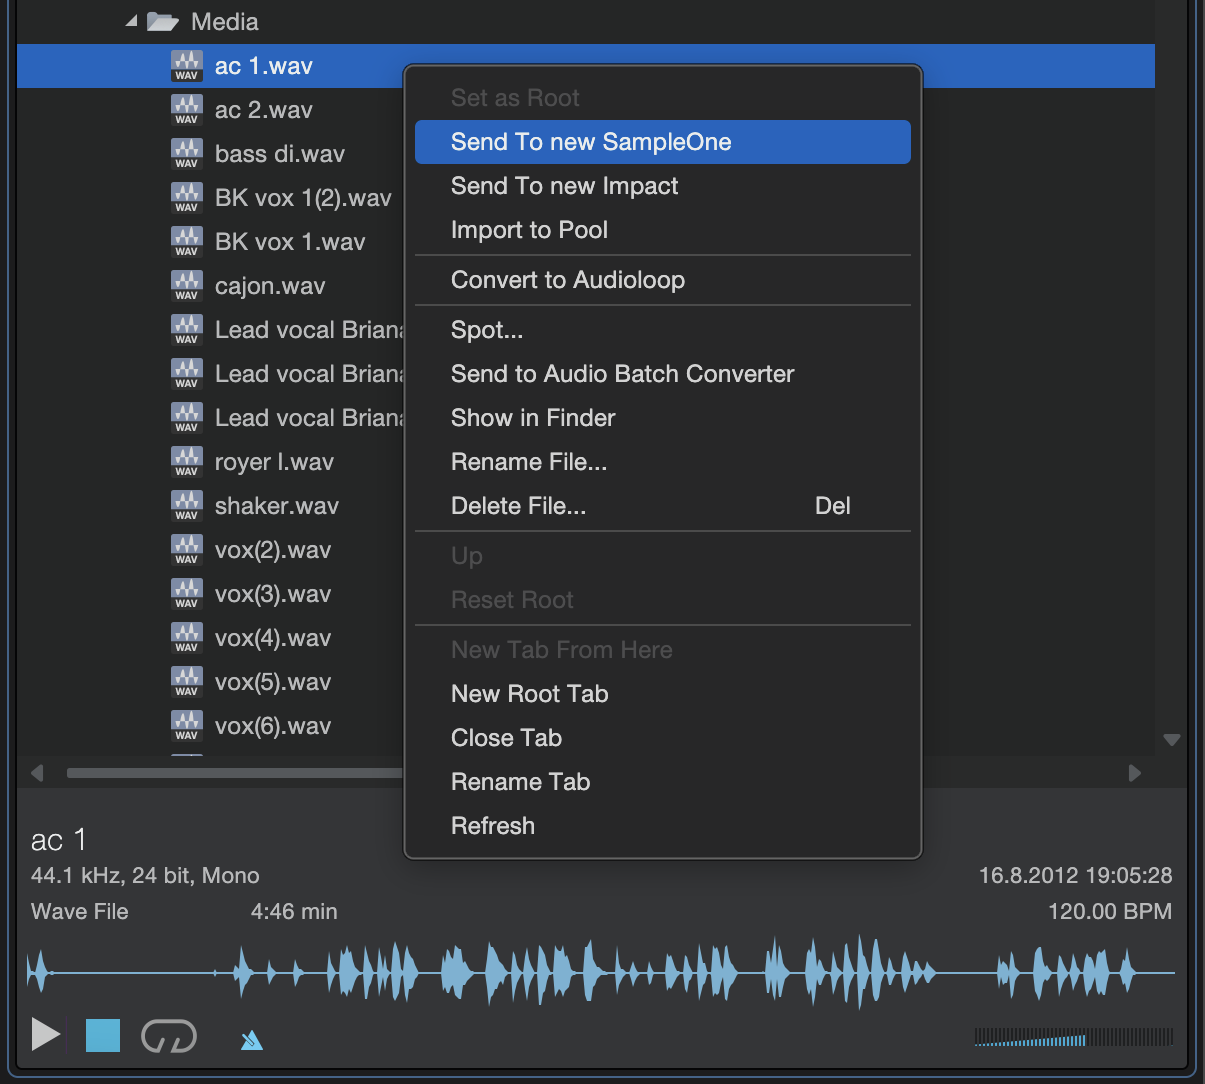
When adding a REX file to SampleOne from the Browser with the Send to New SampleOne command, the REX file’s individual slices are mapped across the keymap (starting at C3 by default, dependent on number of slices), with each slice given its own note.
Fades made to audio in the Arrangement or Editor render and carry over when using the "Send to" command for SampleOne.
Note: REX files don’t work well with sustained sounds, like a guitar riff with lots of repeating delays or a rich harmonium drone. Files with fast attack time (like a drum beat, guitar chord progression, or synth bass melody) are ideal.
Create Matched Instrument Part from Loop
In order to create a matched Instrument Part from a loop in the browser, drag any audio file/Event to SampleOne while holding shift key (this command is known as “Slice & Add Sample” in Fender Studio Pro):
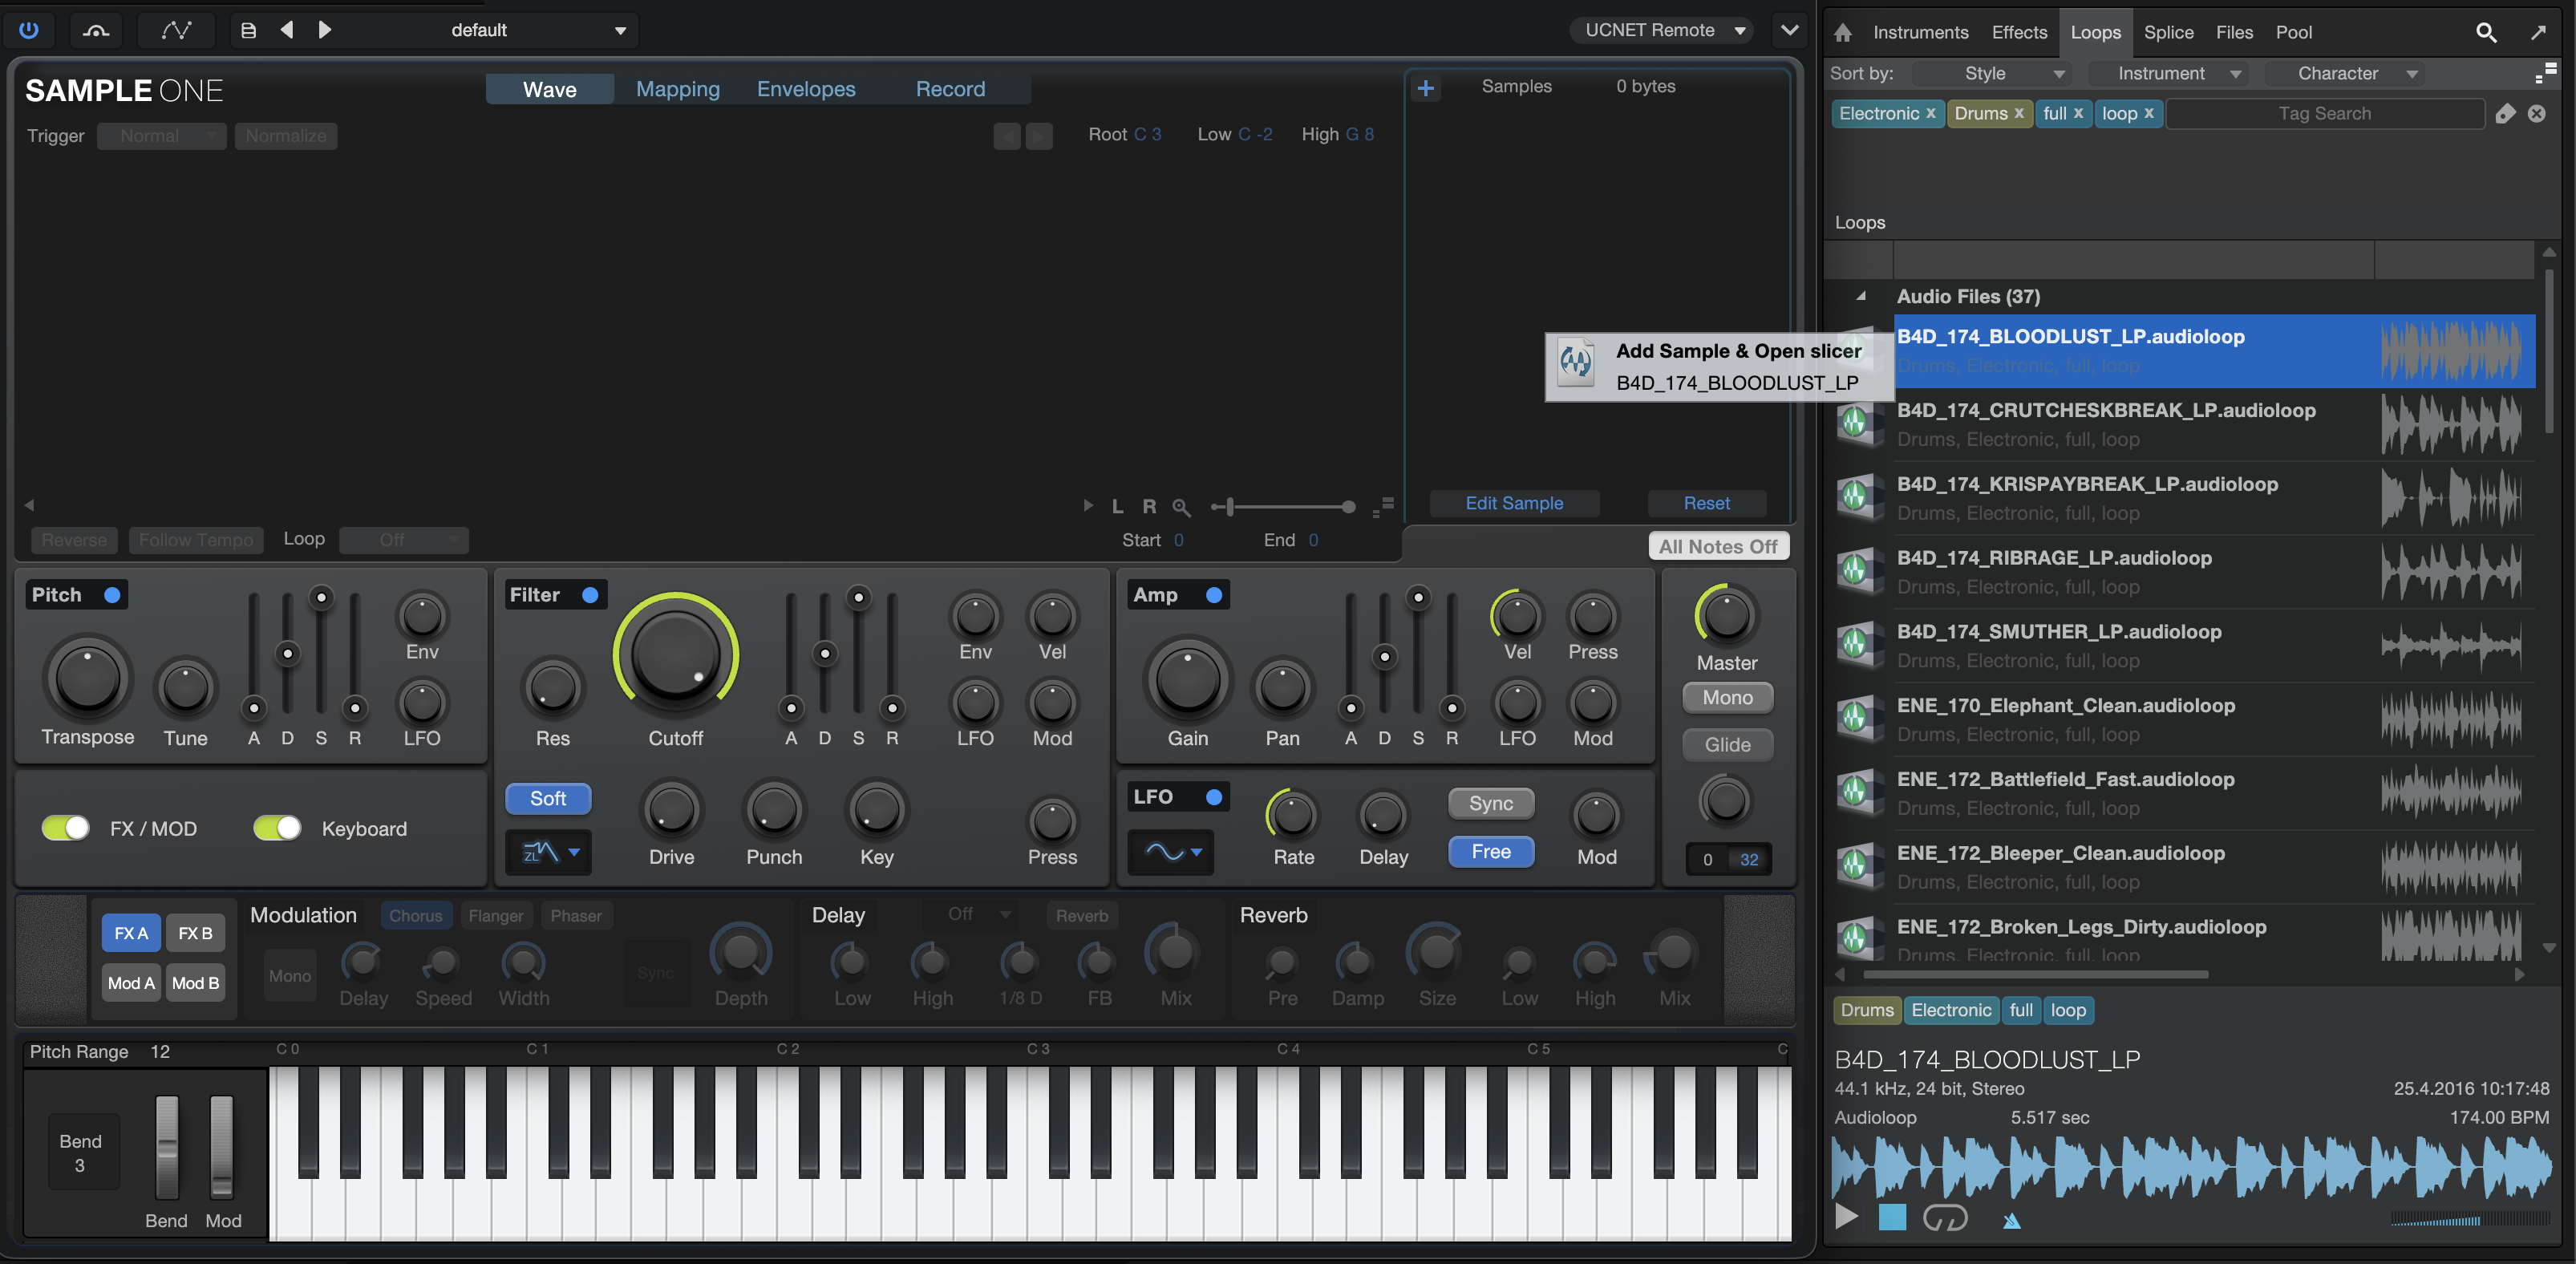
Once you drop the file, the spliced sample is spread across multiple keys of the virtual keyboard and an Instrument Part is also created.
After dropping, the new Instrument Part will be placed at the nearest bar position to the time cursor. The notes will be stretched according to the current Session tempo if the track's timebase is beats, and the part length will always be 1, 2, 4, 8, etc. bars.
On SampleOne’s virtual keyboard, the keys tied to sample splices will have a bar above them:
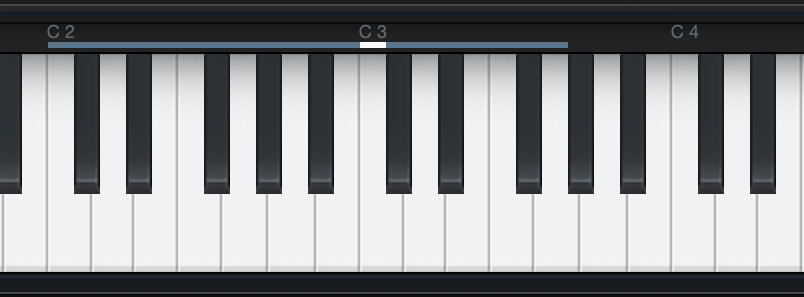
This feature may be especially useful if you would like to split audio drum loops in order to modify them. The same option to create a matched Instrument Part from a Loop is available when you use Impact.
Playing Multiple Samples
Up to 96 samples can be loaded into SampleOne at once, with each loaded sample displayed in the sample list. Select any sample in the list to edit its playback, loop, and keymap range, as well as its root note and loop status. All loaded samples are triggered simultaneously, depending on the keymap range for each sample. For instance, if C3 on your keyboard is set to trigger every sample, pressing C3 triggers every sample at once. In this way, multilayered, or multitimbral sample-playback can be achieved.
Replace a Sample
To replace a sample in SampleOne, select the sample that you wish to replace in the Samples list. Then drag any audio clip from the Browser, or any Audio Event from the Arrange view, into the main display. The sample replaces the previous one in the sample list, and the previously displayed sample waveform updates to reflect the new sample.
Edit Sample This button lets you specify individual envelope settings for the currently selected sample, rather than changing those parameters for all samples, as done by default. If after you've made custom alterations to one sample, you wish to reunify all samples under the same settings, press Reset.
Edit Pitch, Filter, and Amplifier Parameters
The output of each sample loaded in SampleOne can be modified with pitch, filter, and amplifier parameters. Note the [Edit All] button, which allows the simultaneous editing of all sample parameters at once when engaged. The following describes the use of these envelopes.
Pitch
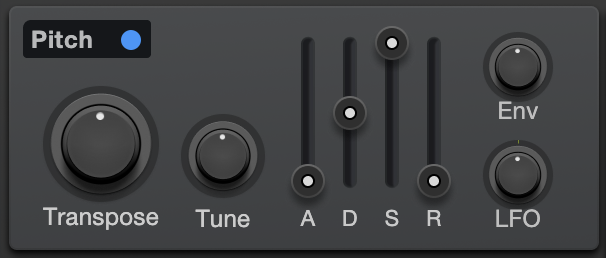
The Pitch controls modify the pitch characteristics of the audio output. Click the button in the upper left corner of the module to activate/deactivate the effects of the Pitch controls.
- Transpose: Transposes the pitch of the sample in semitones. Variable from -48 to +48 semitones.
- Tune: Adjusts the tuning of the sample. Variable from -100 cents to 100 cents.
- LFO: Adjusts the range within which the LFO affects pitch. Variable from -4 octaves to +4 octaves.
- Env: Adjusts the range within which the envelope affects pitch. Variable from -4 octaves to +4 octaves.
- Attack (A): Adjusts the amount of time it takes to reach the Env value from the original pitch of the sample once a sample has been triggered. Variable from 0 to 20 seconds.
- Decay (D): Adjusts the amount of time it takes to reach the sustain level after reaching full volume. Variable from 0 to 20 seconds.
- Sustain (S): Adjusts the Sustain level. Variable from -∞ dB to 0 dB. The sustain period continues until the sample trigger stops.
- Release (R): Adjusts the amount of time it takes to reach the original pitch after the sample trigger has stopped. Variable from 0 to 30 seconds.
Filter
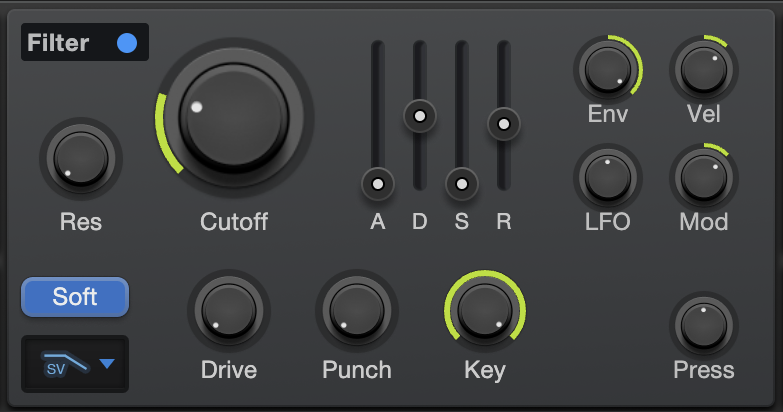
The Filter parameters modify the frequency characteristics of the audio output. Click the button in the upper left corner of the module to activate/deactivate the effects of the filter.
- Cutoff: Adjusts the filter cutoff frequency. Variable from 20 Hz to 20 KHz.
- Vel: Adjusts the maximum range, in octaves, within which note velocity can affect the maximum filter range (the value used when velocity equals 127).
- Press: Adjusts the amount that Note Controller Pressure affects the filter cutoff. Positive values will raise the cutoff frequency as pressure increases. Negative values will lower the cutoff frequency as pressure increases.
- Mod: Adjusts the range, expressed as distance in octaves, within which the modulation wheel on your Keyboard can adjust the instantaneous filter cutoff frequency (the value used when the mod wheel value equals 127).
- LFO: Adjusts the range within which the LFO affects the cutoff frequency. Variable from -8 octaves to +8 octaves.
- Env: Adjusts the range within which the envelope affects the cutoff frequency. Variable from -8 octaves to +8 octaves.
- Res: Adjusts the relative resonance of the filter. Variable from 0 % to 100 %.
- Type: Selects the filter type. Choose from LP24 Ladder, LP24 Zero-Latency, LP12 Ladder, BP12 Ladder, HP12 Ladder, LP12 State, BP12 State, HP12 State, and Eco Filter (lowest CPU use).
- Attack (A): Adjusts the amount of time it takes for the filter cutoff frequency to move from the frequency value to the envelope value once a sample has been triggered. Variable from Variable from 0 to 20 seconds.
- Decay (D): Adjusts the amount of time it takes to reach the sustain level after reaching the envelope value. Variable from Variable from 0 to 20 seconds.
- Sustain (S): Adjusts the sustain level, which is the mix of the signal filtered at the envelope value with the signal filtered at the frequency value. Variable from -∞ dB to 0 dB. The sustain period continues until the sample trigger stops.
- Release (R): Adjusts the amount of time it takes the filter to reach the frequency value after the sample trigger has stopped. Variable from Variable from 0 to 30 seconds.
- Drive: This lets you specify an amount of filter overdrive, to add fullness and saturation artifacts to your sound.
- Punch: This control lets you add a range of percussive attack to the start of each note. At the lowest setting, dynamics are unchanged. At higher settings, the sound becomes more aggressive and more readily pops through the mix.
- Key: This control sets the relationship between incoming note Pitch and filter Cutoff. In physical instruments, higher notes tend to produce higher harmonics, brightening slightly as you go up the scale. On a synthesized instrument, if the filter stays static, setting the proper tone in the lower note ranges may cause inappropriate dullness in the higher notes. So, with the Key parameter, we can compensate for this, and create a more natural-sounding range of timbres up and down the keyboard.
- Soft: This control lets you switch between two differing analog-modeled processing circuits within the filter. Engage Soft for a mellower, darker tone. Disengage it for a brighter, more aggressive sound.
Amp
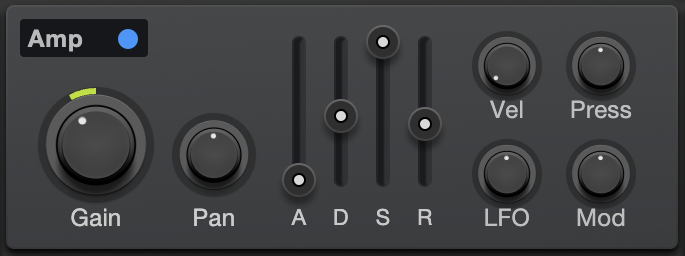
The Amp controls modify the amplitude characteristics of the audio output. Click the button in the upper left corner of the module to activate/deactivate the effects of the Amp controls.
- Gain: Adjusts the maximum volume of the audio output. Variable from -144 to +20 dB.
- Vel: Adjusts the relative amount that note velocity affects the maximum amplitude. Variable from 0 to 1.
- Press: Adjusts the amount that Note Controller Pressure affects the maximum amplitude. Positive values will raise the volume as pressure increases. Negative values will lower the volume as pressure increases.
- Mod: Adjusts the relative amount that the modulation wheel on your Keyboard can adjust the instantaneous amplitude at any time. Variable from -1 to 1.
- LFO: Adjusts the range with which the LFO affects playback volume.
- Pan: Adjusts the stereo pan of the audio output. Variable from full L to full R.
- Attack (A): Adjusts the amount of time it takes to reach full volume once a sample has been triggered. Variable from 0 to 20 seconds.
- Decay (D): Adjusts the amount of time it takes to reach the sustain level after reaching full volume. Variable from 0 to 20 seconds.
- Sustain (S): Adjusts the sustain level. The sustain period continues until the sample trigger stops.
- Release (R): Adjusts the amount of time it takes to reach a level of -∞ after the sample trigger has stopped. Variable from 0 to 30 seconds.
LFO
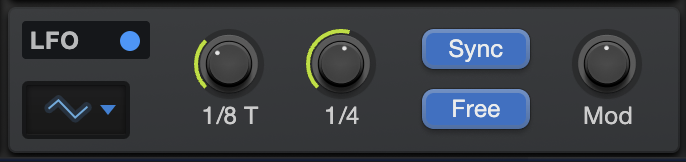
Various parameters of SampleOne can be modulated, or varied over time, with the LFO. The following describes how to use the LFO to modulate parameters.
- LFO: Click the Activate button to activate/deactivate.
- Sync/Free: Choose to sync the modulation speed to tempo (variable from 1/64T to 4 bars), adjust the speed freely as frequency (variable from 0.01 Hz to 500 Hz), or sync to note-on by selecting neither Sync nor Free (variable from 0.01 Hz to8 KHz).
- Rate: Set the modulation speed of the LFO, in either rhythmic subdivisions of the Session tempo (Beats), or milliseconds (Speed), depending on Sync/Free status.
- Type: Click to select, from top to bottom, the sine, saw, triangle, square, or sample and hold LFO waveform.
- Delay: Adjusts the amount of time before the LFO affects anything once a sample is triggered. Variable from 0 to 2 seconds.
- Mod: Adjusts the peak amplitude amount with which the modulation wheel controls the LFO signal strength (LFO strength when mod wheel value equals 127). Variable from -1 to 1.
Master
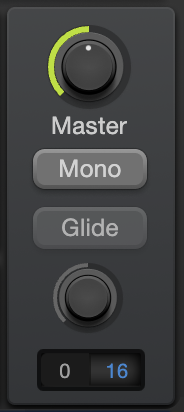
The Master controls act on a global level, affecting all samples in the current patch.
Master: Sets master volume for the entire patch. Variable between -∞ and +10 dB.
Mono: Turn on this option to enable monophonic playing (one voice at a time only).
Glide: Enable this option to introduce Glide, and adjust the relative amount of Glide using the Glide Time knob below. Glide creates gradual shifting over time between consecutive notes, as opposed to the usual immediate switch from one note to the next.
Polyphony: By default, up to 32 voices can play simultaneously, meaning you can play 32 separate notes before the first note you played is cut off to allow more voices to play. Click and drag on the blue number to add or subtract total voices. 64 voices is the maximum.
Effects (FX A & FX B)
SampleOne offers seven built-in effects processors to add dimension to your sounds. They are arranged in two banks: FX A (Modulation, Delay, and Reverb) and FX B (Gater, EQ, Distortion, and Pan). You can enable or disable each effect by clicking its name. You can show or hide the FX section of the plug-in window by clicking the [FX] button.
FX A
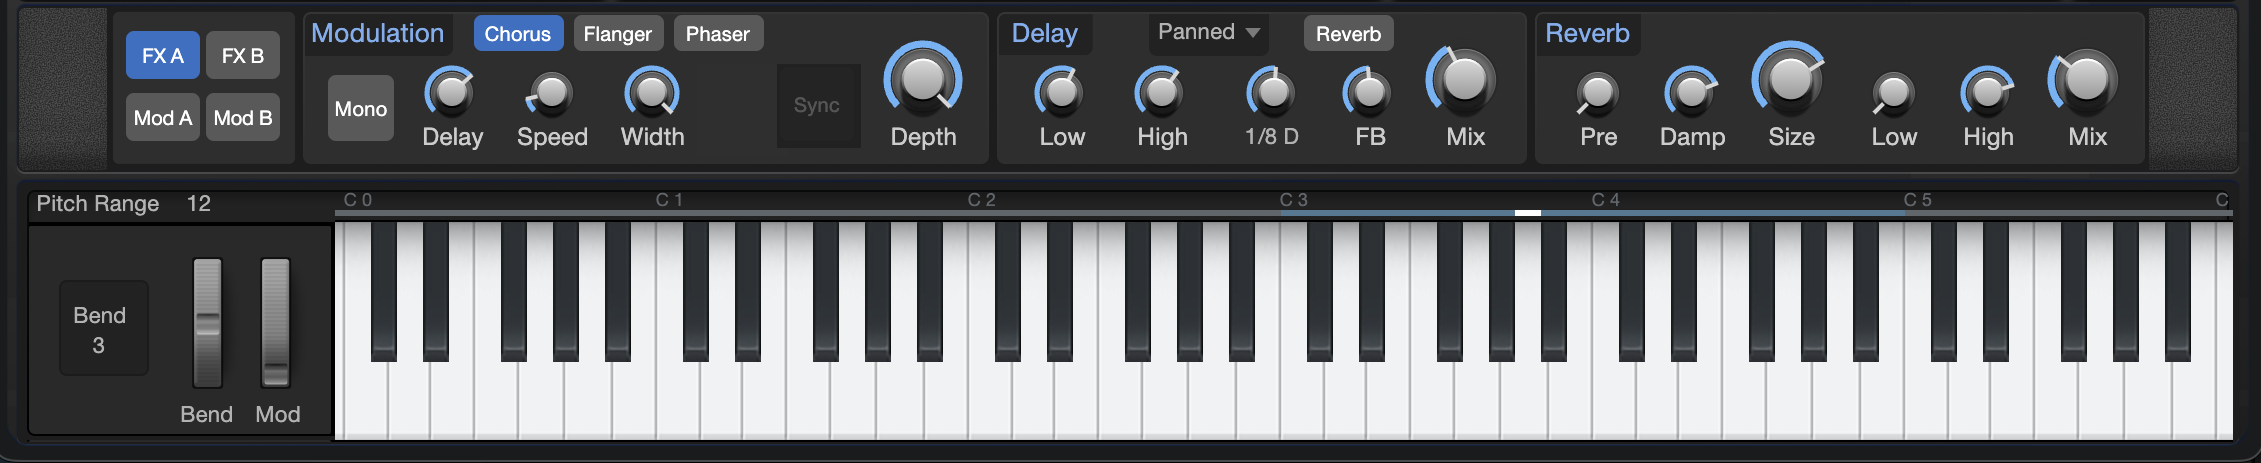
Modulation
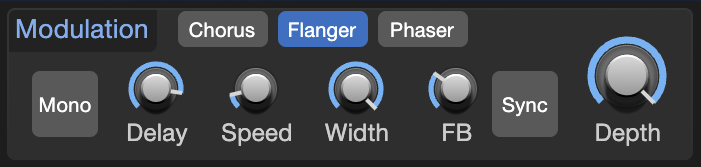
This processor creates time-based modulation effects. Choose from the following modes by clicking the [Chorus], [Flanger], or [Phaser] button:
- Chorus: This processor creates effects similar to that of multiple identical instruments playing the same part simultaneously. The synth signal is fed through a short, modulated delay, which is then mixed with the dry signal. Chorus offers the following controls:
- Mono: Engage this option to sum the wet (affected) signal to mono.
- Delay: This control lets you set the length of the modulated delay. Higher settings create full-bodied chorusing effects, while lower settings create more pronounced harmonics, akin to the effects of a Flanger.
- Speed: This control lets you set the speed at which the delay line is modulated. Lower settings create slow, sweeping effects, while higher settings create faster, more aggressive modulation.
- Width: This control lets you set the degree to which the delay line is modulated. Lower settings produce subtler chorusing effects, while higher settings produce more pronounced changes in timbre over time.
- Depth: This control lets you blend between the dry signal (all the way left) and the chorused signal (all the way right).
- Flanger: This processor creates resonant, hollow-sounding sweeping effects. The synth signal is fed through a short, modulated delay, which is mixed with the dry signal. While similar to the workings of a Chorus effect, Flangers get their signature sound by employing smaller delay times than those used in chorusing, combined with a feedback system that can add extra resonance to the sweep. Flanger offers the following controls:
- Mono: Engage this option to sum the wet (affected) signal to mono.
- Delay: This control lets you set the length of the modulated delay (in ms), which changes the pitch of the resultant resonance. Higher settings create lower-pitched resonance, while lower settings create resonances at a higher pitch.
- Speed: This control lets you set the speed at which the delay line is modulated. Lower settings create slow, sweeping effects, while higher settings create faster, more aggressive modulation.
- Width: This control lets you set the degree to which the delay line is modulated. Lower settings produce subtler flanging effects, while higher settings produce more pronounced changes in timbre over time.
- Feedback (FB): This control lets you set the amount of output signal to feed back into the Flanger. Higher amounts of Feedback add to the resonance of the sweeping effect.
- Sync: Engage this option to enable setting Flanger modulation speed to a rhythmic value (such as 1/8th-note or 1/4-note) relative to Session tempo. Disengage to set Rate on a continuous scale.
- Depth: This control lets you blend between the dry signal (all the way left) and the flanged signal (all the way right).
- Phaser: This processor creates dreamy, otherworldly sweeping effects. The synth signal is fed through a series of all-pass filters that alter its phase. When mixed with the dry signal, this creates a series of peaks and valleys in the frequency response that changes depending on the degree of phase shift applied. Phaser offers the following controls:
- Mono: Engage this option to sum the wet (affected) signal to mono.
- Shift: This control lets you specify the amount of phase shift to apply. Lower settings focus the phasing effect in the lower frequencies, while higher settings focus the effect in higher frequencies.
- Speed: This control lets you set the speed of modulation applied to the phase shift amount. Lower settings create slow, sweeping effects, while higher settings create faster, more aggressive modulation.
- Width: This control lets you set the degree to which the phase shift amount is modulated. Lower settings produce subtler effects, while higher settings produce more pronounced changes in timbre over time.
- Feedback (FB): This control lets you set the amount of output signal to feed back into the Phaser. Higher amounts of Feedback add to the resonance of the sweeping effect.
- Sync: Engage this option to enable setting Phaser modulation speed to a rhythmic value (such as 1/8th-note or 1/4-note) relative to Session tempo. Disengage to set Rate on a continuous scale.
- Depth: This control lets you blend between the dry signal (all the way left) and the phase-shifted signal (all the way right).
Delay
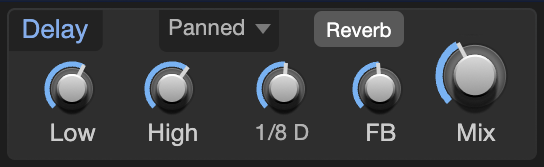
This processor creates an echo effect, either as a single delayed repeat of the input signal, or a trailing series of echoes. The Delay effect offers the following controls:
- Low and High: These controls let you set the cutoff frequencies of the provided high-pass and low-pass filters, which affect only the delayed signal.
- Delay Time: This control lets you specify the length of the delay effect, in rhythmic values (such as 1/8th-note or 16th-note) relative to the tempo of the Session.
- Feedback (FB): This control lets you set the amount of affected signal that is fed back into the Delay effect. At zero, there is just one repeat. As you increase the value, the trail of repeats grows.
- Mix: This control lets you blend between the dry signal (all the way left) and the delayed signal (all the way right).
- Ping-Pong Mode: This menu lets you enable and configure the stereo Ping-Pong delay mode. You can choose from the following modes:
- Off: The delay works as normal, without ping-pong functions.
- Panned: Using a multi-tap delay structure, this mode pans each delay repeat to the right or left, in sequence.
- Dotted and Double: These modes work similarly to Panned mode, but employ staggered spacing of the delay taps to produce a dotted-note or syncopated straight rhythm in the delay repeats.
- Reverb: Enable this option to route the output of the Delay effect to the Reverb effect, enabling further diffusion and abstraction of the delay signal.
Reverb
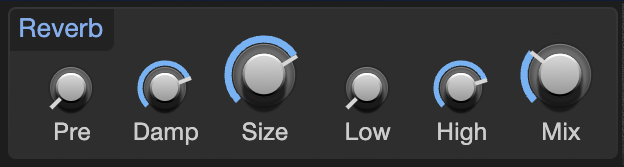
This effect places the synth signal within a synthesized reverberant physical space, ranging from short reverbs that emulate smaller rooms, to long reverbs that evoke the sounds of large spaces, such as halls and cathedrals. Reverb offers the following controls:
- Pre-Delay (Pre): This parameter lets you specify an amount of delay applied to the reverb-processed signal, in a range between zero and 500 ms. This emulates the delay inherent in large spaces between the impact of a sound and its audible reverberation. Lower settings are best suited to shorter reverb times, and longer settings with longer reverb times, but let your own taste be the judge.
- Damping (Damp): This control lets you set an amount of high-frequency attenuation to apply to the reverb signal. Spaces with soft surfaces tend to lose treble quickly as the sound reverberates, resulting in a short bright reverb followed by a progressively darker tail. Spaces with harder surfaces retain high-end more efficiently over time. Set Damp to its lower range to emulate hard surfaces, and to the higher ranges to enable further damping, to emulate softer surfaces.
- Size: This control lets you set the length of reverberation from the moment a sound starts, in a range between 100 ms and 10 seconds. The larger the size, the longer the tail of the reverb, and the larger the emulated space sounds.
- Low and High: These controls let you set the cutoff frequencies of the provided high-pass and low-pass filters, which affect only the reverb signal.
- Mix: This control lets you blend between the dry signal (all the way left) and the reverb signal (all the way right).
FX B

Gater
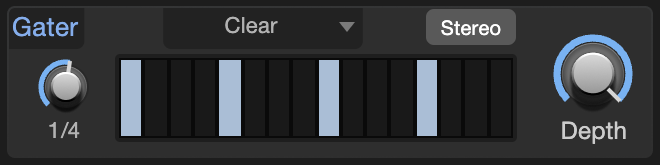
This is a rhythmic gating effect, able to create a series of syncopated breaks in the synth signal. A variety of presets are provided, each with a different rhythmic gating pattern. However, the fun really begins when you create your own. Gater offers the following controls:
- Beats: This control lets you set the length of the gating cycle, in rhythmic values (such as 1 bar or 1/2-note) relative to Session tempo. For example, at a setting of 1 bar, the 16 steps in the cycle repeat every bar, effectively representing 16th-notes. At a 1/2-note setting, the 16 steps repeat each half-bar, representing 32nd-note values.
- Beat Steps: This grid lets you specify which steps in the cycle let the signal pass through, and which gate the signal to silence. Click on a step to enable or disable gating for that step.
- Stereo: Engaging this option creates a separate beat grid for each side of the stereo field. When engaged, you'll see two rows of beat steps, the top row specifying gate steps for the left channel, and the bottom row gating the right channel.
- Depth: This control lets you blend between the gated and dry signals, allowing for rhythmic gating effects while retaining the continuity of the synth sound.
EQ
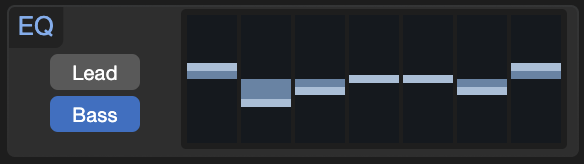
This is a graphic equalizer effect, perfect for quick tonal shaping. Set the EQ bands to emphasize or attenuate bands of frequencies to suit your needs. When a band is in the center of its range, it neither adds nor subtracts. When moved above the center, it emphasizes the chosen frequency. Moved below the center, it attenuates that frequency.
Choose between Lead mode, with frequencies chosen to suit aggressive, up-front sounds, or Bass mode, with wider-ranging frequencies that work better for basses and mellower chordal parts.
Distortion
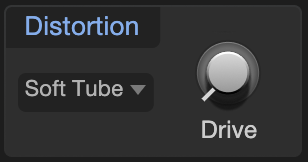
This is a variable distortion effect, which adds grit and character to your sounds. Choose from a variety of distortion types, from fizzy transistor fuzzes to thick, warm tube overdrives. Set the amount of distortion with the Drive knob.
Pan
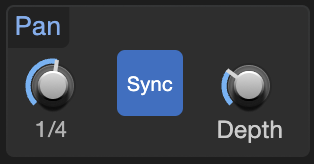
This is an auto-pan effect, which pans the synth signal left and right over time. Pan offers the following controls:
- Speed: This control lets you set the speed at which the signal is panned left and right.
- Sync: Enable this option to set pan speed to a rhythmic value (such as 1/4-note or 16th-note) relative to Session tempo. Disable this option to set pan speed along a continuous range.
- Depth: This control lets you set the degree to which the signal is panned. Lower settings give a subtly panned effect, while higher settings pan the signal more radically, all the way to fully left and right in each cycle.
Modulation Matrix

SampleOne provides 16 configurable modulation routings, in two banks of eight (Mod A and Mod B). Modulation signals can be routed from a selection of incoming MIDI controller signals including MPE data (such as Pitch Bend, Mod Wheel, Aftertouch, Poly Pressure, Note Timbre, and Pitch Control), modulation generators (such as the LFOs and envelopes), or the pitch or velocity of played notes.
These modulation signals can be used to vary most of the parameters throughout SampleOne, including modulation sources themselves (such as LFO 2 modulating the rate of LFO 1, or the Decay of Env 2).
Each modulation slot has a bypass button at the top, which lets you enable or disable the flow of the modulation signal. Below that are the input selector and modifier selector. If you assign a modulation source to the input selector only, that signal is routed directly to the chosen destination. In some cases, you’ll want to govern the flow of one mod source before it reaches its destination, using the signal from another mod source. For example, you may want to control the output level of LFO 1 (routed to a parameter such as oscillator pitch) with the Mod Wheel. In this case, you'd choose Mod Wheel with the input selector, and LFO 1 with the modifier selector below.
Below that is a slider that controls the amplitude and polarity of the modulation signal. Set at its center, no modulation occurs. Move the handle right of center to send an increasing amount of the modulation signal, at its normal (positive) polarity, to the chosen destination. Move it left of center to send the signal to its destination with a negative value.
If the parameter you wish to modulate is set to a high value, you may want to send a negative modulation signal to it, driving the setting downward and causing more audible effects. Positive-going modulation signals are more efficient when modulating parameters set to low values.
A selector at the bottom of each modulation slot lets you choose the destination of the chosen modulation signals.
Virtual Keyboard

The virtual keyboard lets you easily click to play notes or manipulate the Pitch and Mod wheels, while auditioning or editing patches when you're away from a MIDI keyboard. The keyboard display also shows you which notes are currently being played, as well as the root note and pitch mapping span of the currently selected sample. You can show or hide the virtual keyboard at any time by pressing the [Keys] button.
Note that for a more playable keyboard experience when away from your MIDI controller, you can also use Fender Studio Pro's QWERTY Keyboard Device to play notes using your computer's keyboard.
Next to the virtual keyboard is the Bend parameter, which lets you set the pitch bend range of the Pitch wheel, in semitones.
Working with .multisample and .soundx Files
Given that it's so easy to create new sample libraries in SampleOne, you may find that you want to exchange them with other people, or use them in different instruments, such as Presence. To export the current set of samples as a .multisample file, click the menu button and choose Export Multisample File... To export the current patch as a .soundx file for other SampleOne users to try, click the menu button and choose Export Preset... To import a multisample or soundx preset file into SampleOne, simply drag-and-drop it onto the plug-in window.
File Sharing with Impact
Once you've created some samples you love, you can always import them to Impact using drag-and-drop. To do this, click and drag your chosen sample from the sample list in SampleOne, and hover your cursor over an Impact tab at the top of the Instruments window. Impact is then shown, and you can drop your sample onto any pad. You can also select multiple samples in SampleOne, then click and drag the group into Impact as described above. Samples can be dragged from Impact to SampleOne as well.
By default, when multiple samples are dropped onto a pad, they are all assigned to that pad and are played interchangeably, according to the current Layer Mode. To distribute multiple samples across multiple pads, press and hold [Shift] before dropping them. The first sample is assigned to the selected pad, and each subsequent sample is assigned to subsequent pads in ascending note order.
Light or Dark Theme
You can switch between a light or dark color theme by clicking the Fender logo at the top right corner of the SampleOne window.