Cue Mixes and Low-Latency Monitoring
Fender Studio Pro features a powerful Native Low-Latency Monitoring system that provides low-latency monitoring for audio recording and virtual instruments, without compromises in system performance. Hardware Low-Latency Monitoring is also available when using a compatible DSP-enabled audio interface. In this section, we will discuss how to take advantage of these features to create low-latency cue mixes for monitoring while recording or composing.
Creating a Cue Mix Output
In Fender Studio Pro, it is possible to quickly and easily create multiple cue mixes. A cue mix is separate from the main mix and is usually provided to musicians for monitoring purposes during recording.
For instance, when recording vocals, the engineer and vocalist often need to hear different mixes. Many vocalists want to hear their vocal boosted in the mix, possibly with some reverb to make it sound natural, while the engineer might want to focus on how the performance balances with the rest of the mix. It is common to use Cue Mix Systems during shows and rehearsals, granting all performers the ability to set up separate headphone mixes on stage when no FOH mixer is used. The cue mix functionality in Fender Studio Pro makes this task easy.
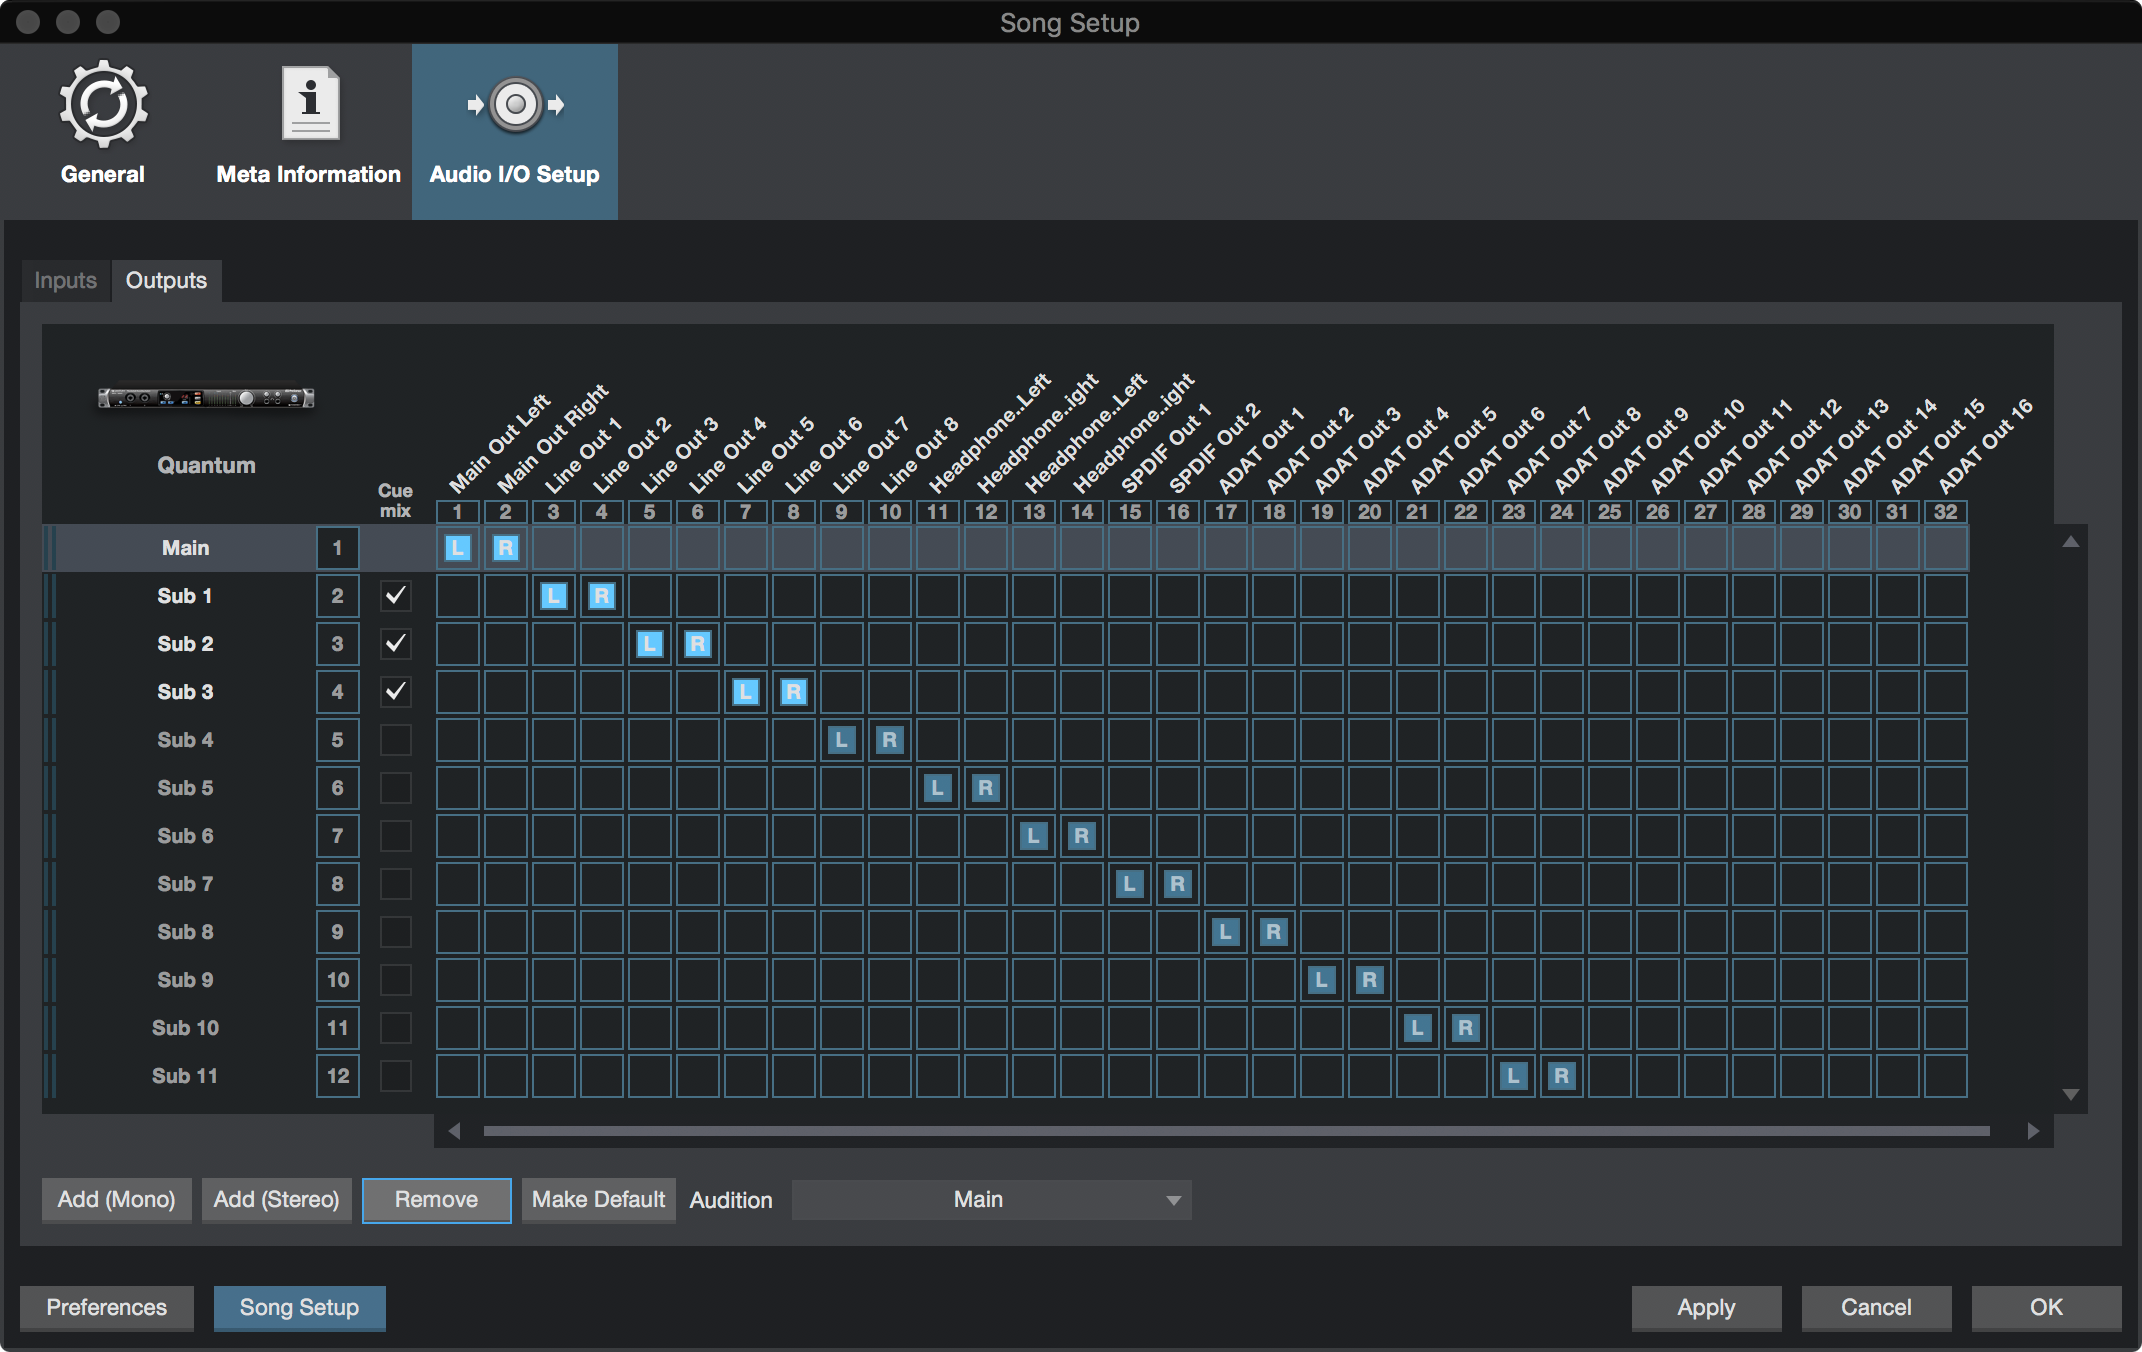
The first step in building a cue mix is to create an additional Output Channel. To do this, open the Session/Session Setup/Audio I/O Setup (macOS: Preferences/Show Setup) window in a Session, switch to the Outputs tab, and add a new Stereo Output Channel. Next, specify that this output is a Cue Mix output by clicking on the Channel’s Cue Mix checkbox. You can create as many cue mixes as your audio interface has available stereo outputs.
Fender Studio Pro adds a second option for cue mix sends: For use with external cue mix systems, such as PreSonus EarMix, it is not required to have a cue mix send on every channel. To enable the External Cue Mix feature, navigate to the Outputs tab from the Audio I/O Setup page. Select the checkbox next to “Use External Cue Mix System”:
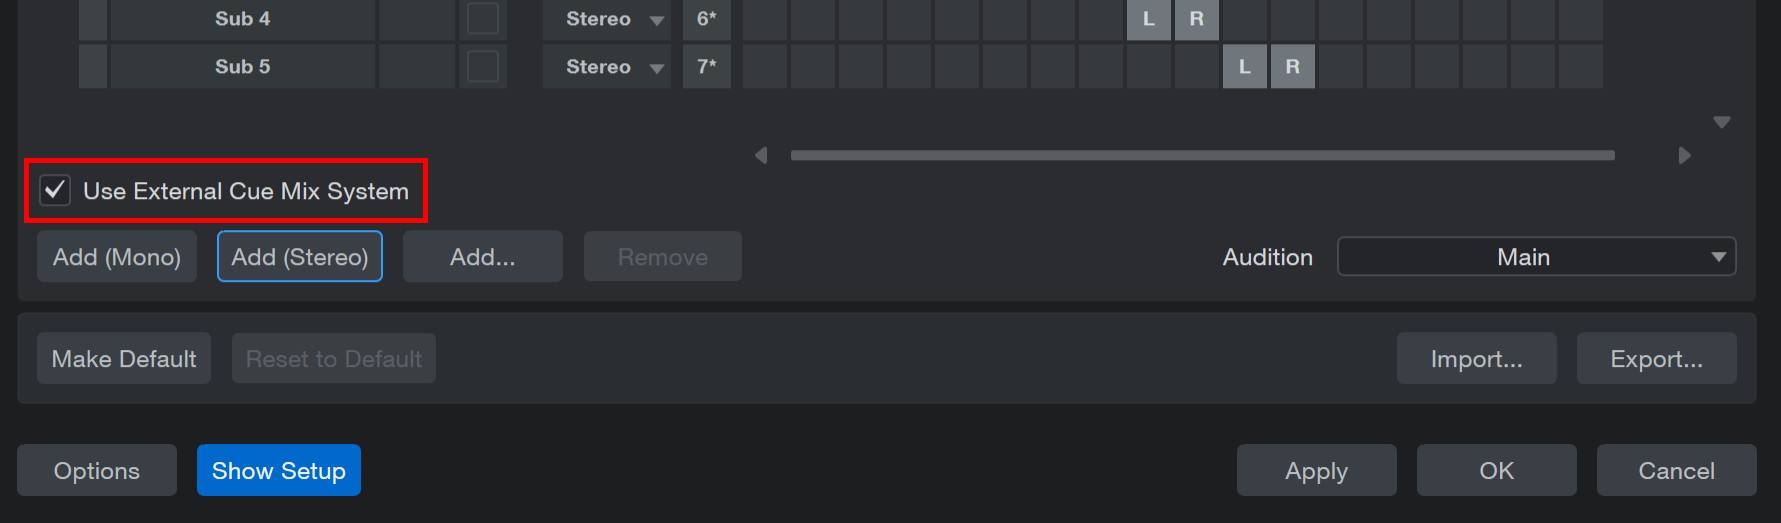
After enabling “Use External Cue Mix System,” all cue mix folders will be empty at first. Each cue mix header menu will list all available outputs (“Destinations”) and you can select which output should be used. This also works for multiple selected channels.
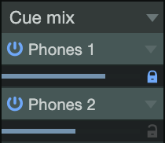
Now that you have created a Cue Mix output, you can see special Send objects (called Cue Mix objects) in the Channels of the Console. In the Small Console view, Cue Mix objects appear in the right column when a Channel is expanded. In the Large Console view, Cue Mix objects appear below the Send Device Rack on each applicable Channel.
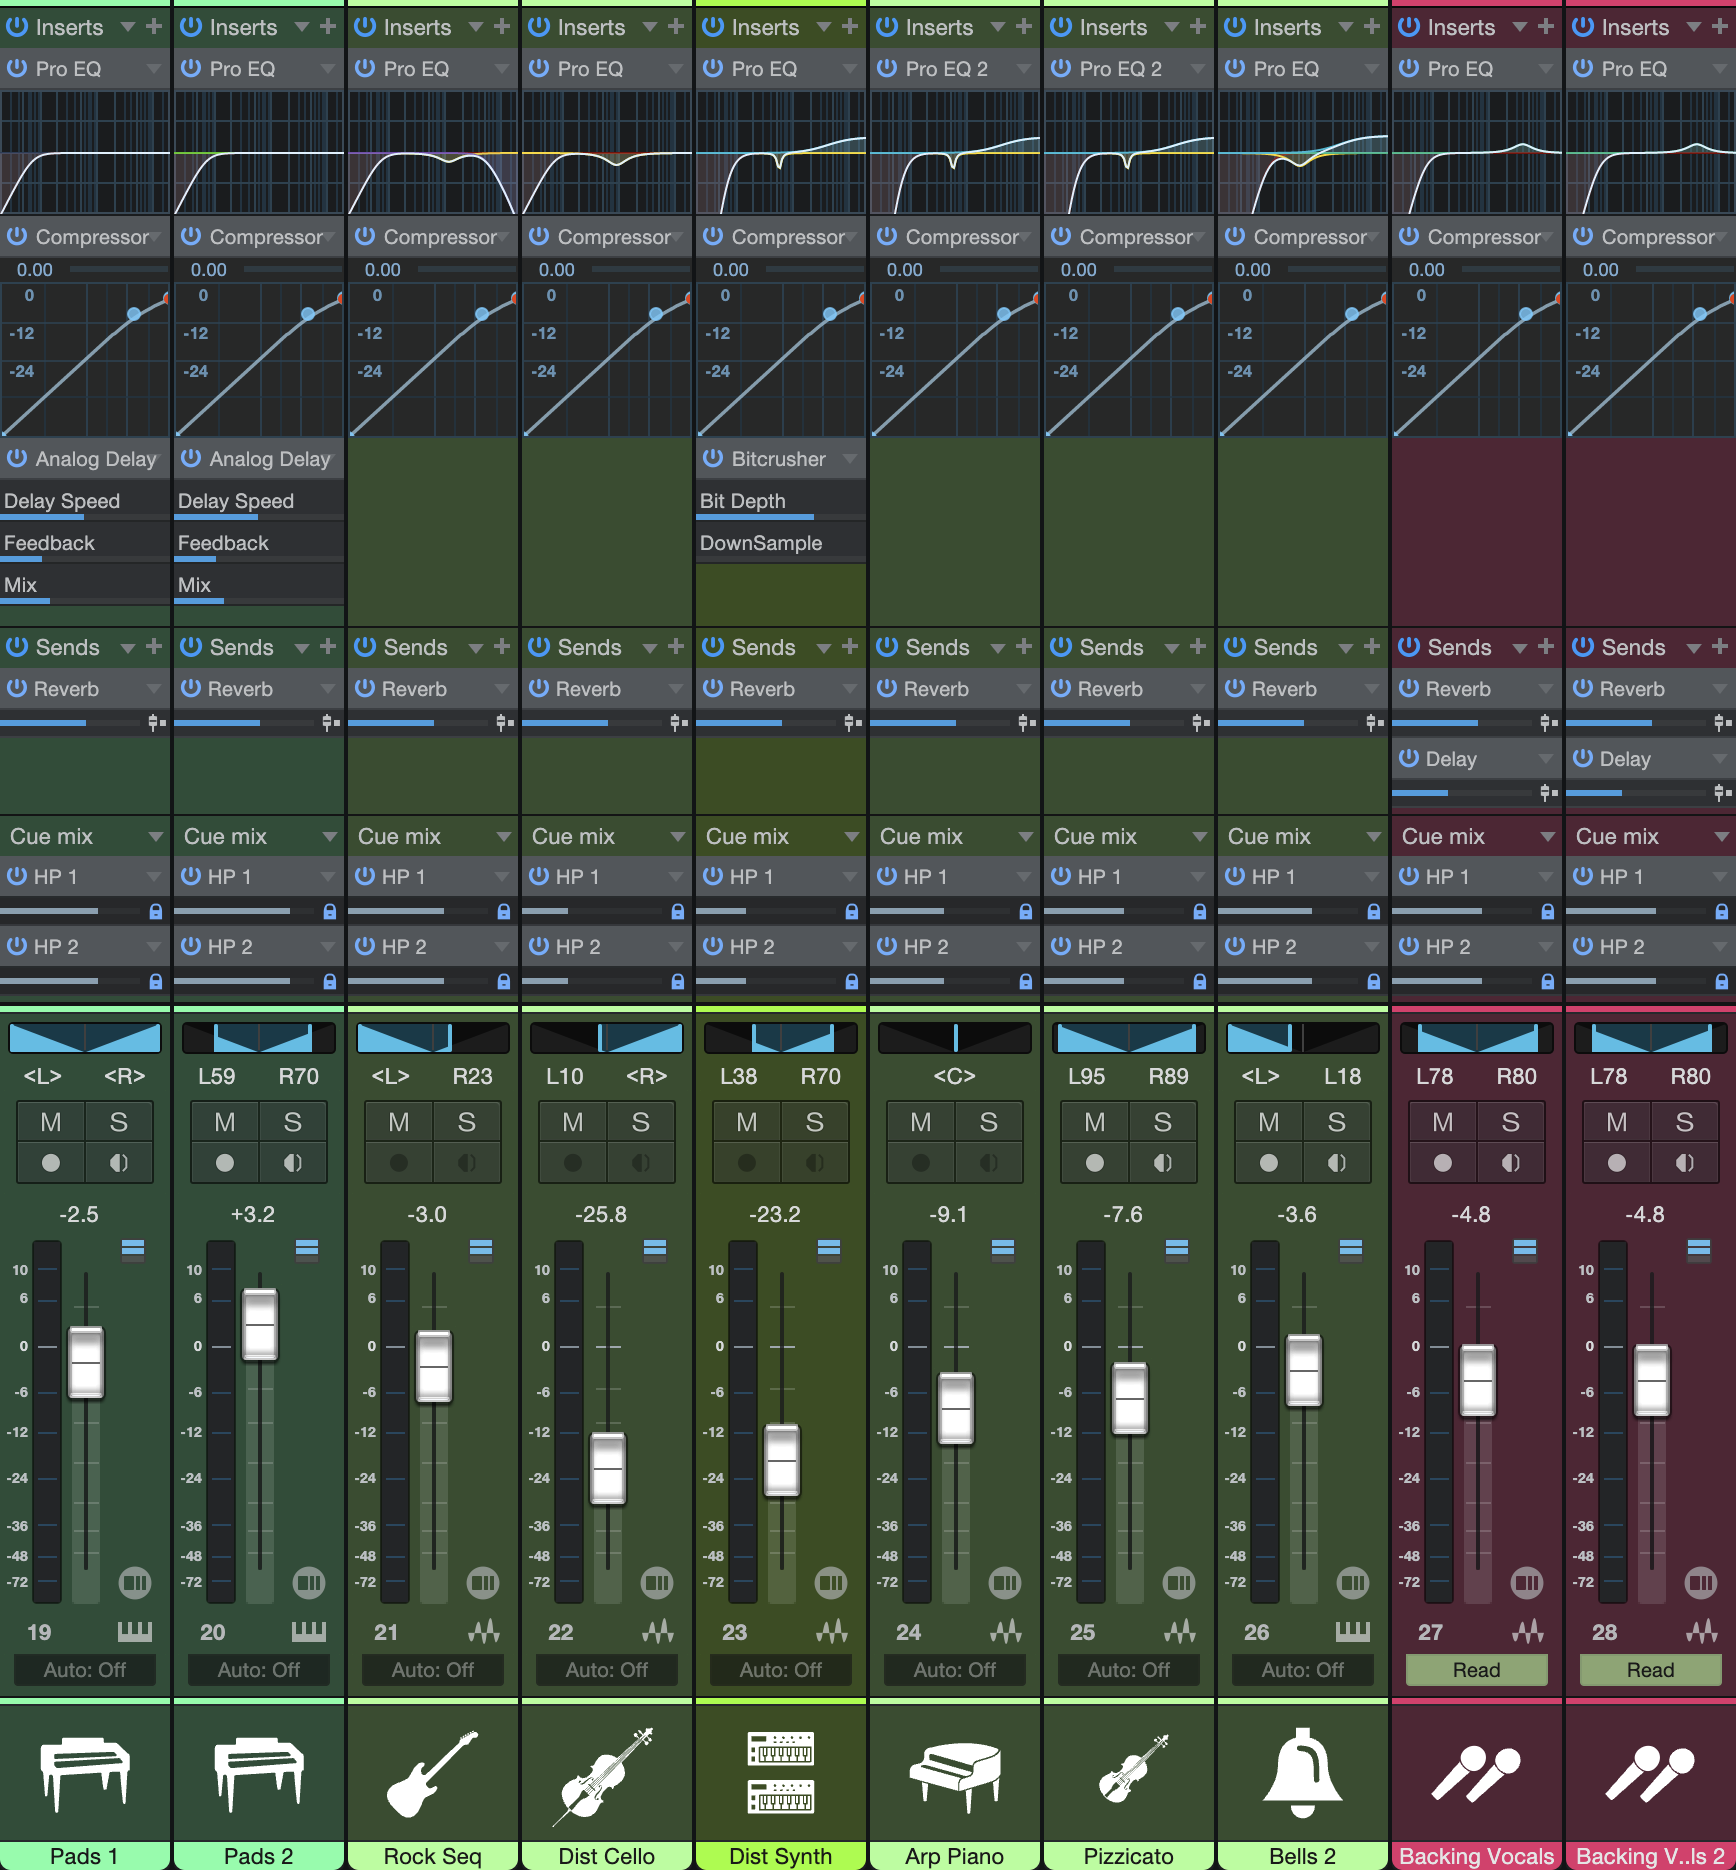
Each Cue Mix object features an Activate button, horizontal level and pan faders, and a Lock to Channel button.
The “Cue mix mute follows channel option" has to be engaged in the preferences in order to use Cue Mixes for FX Channels.
Mixing the Cue Mix
Cue mixes are built using Cue Mix objects. By default, the level and pan values are locked to the channel level and pan faders. This means that each Cue Mix is identical to the main mix in the Console. Changing the level or pan in the Cue Mix object unlocks both settings, allowing independent control of level and pan for each Channel in each Cue Mix. Thus, the level and pan for Channels in a Cue Mix can be completely different from the related level and pan in the main mix.
At any time, you can toggle the lock state of the Cue Mix level and pan back to the Channel settings by clicking on the Lock to Channel button. (The lock icon.) To completely remove any Channel from a cue mix, simply deactivate the Cue Mix object for that Channel.
Double-clicking the Cue Mix object will bring up a larger pop-up interface for fine adjustments.

These pop-ups display The Cue Mixes for the currently-selected channel. With the left/right arrow keys you can navigate to the Cue Mixes of other channels across the console.
Monitoring Live Input in a Cue Mix
Cue mixes are normally used in a recording situation in which one or more live inputs need to be monitored. This is where the Cue Mix feature in Fender Studio Pro is very useful. Monitoring with very low latency can be achieved using the Native Low-Latency Monitoring system in Fender Studio Pro.
You can also achieve low-latency cue mixes by using Hardware Low-Latency Monitoring with a compatible audio interface that provides that feature, such as a Fender Studio 192, Studio 1810, or Studio 1824 interface. These interfaces feature internal hardware mixers that provide low-latency monitoring. While these mixers are easy to use, Fender Studio Pro makes it even easier by allowing you to control the mixers from within the software.
Let’s return to our example of recording live vocals. For a vocalist to be comfortable and perform well, it is important that the performance sound as natural and as polished as possible. Vocalists need to hear themselves well, with no audible delay of their voices in the mix. Adding some reverb provides a little ambiance so the voice is not dry and lifeless.
Here’s how this scenario would look in Fender Studio Pro:
- Set up a Cue Mix output for the vocalist.
- Record-enable and monitor-enable the vocal Track.
- Engage the Enable Direct Monitoring (or "D") button below the level fader on the Cue Mix output being used by the vocal channel. This enables Native or Hardware Direct Monitoring for that Cue Mix output (depending on what is in use).
- Note: Channels that are monitored using Native or Hardware Direct Monitoring display a "D" mark at the bottom of their channel strip.
- Create a Send on the vocal channel to an FX Channel with your favorite reverb effect.
- The vocalist hears the live low-latency input, as well as the rest of the cue mix, including the output of the reverb. Adjust the level of the vocal and other Channels in the Cue Mix to the vocalist’s liking, and you’re ready to record.
In a few seconds, you can ensure that vocalists hear their voices with low latency, in a custom mix that includes effects. Simultaneously, you can listen to a completely independent main mix, allowing you to focus on engineering while the artist focuses on the performance.
Note that when monitoring with Hardware Direct Monitoring engaged, you do not hear Insert FX on that channel, as you are monitoring the signal before it is processed in software. If you need to hear Insert FX, use Native Direct Monitoring instead. To do this, navigate to Studio Pro/Options/Audio Setup/Processing (macOS: Preferences/Audio Setup/Processing) and enable the "Use native direct monitoring instead of hardware monitoring" option.
Direct Monitoring on the Main Output
The Main output always acts as a Cue Mix, and any Audio or Instrument Channels routed to it can be monitored using Native or Hardware Direct Monitoring (if enabled). To engage Native or Hardware Direct Monitoring for the Main output, enable the "Enable Direct Monitoring" (or "D") button, found below its volume fader. When enabled, the "D" button is green (when using Native Direct Monitoring) or blue (when using Hardware Direct Monitoring).