Customization
Customization allows you to selectively toggle the visibility of specific Fender Studio Pro features from its user interface to create a streamlined Fender Studio Pro experience best-suited to your work.
While Fender Studio Pro’s robust feature set allows you to do nearly anything you could want with music and sound, not every task requires every feature. Both new and experienced users can work more efficiently when presented with a streamlined, non-distracting toolset.

Fender Studio Pro’s default toolbar

A minimal Fender Studio Pro toolbar, thanks to the Customization Editor.
Customization Settings can be edited and recalled from the View/Customization menu.
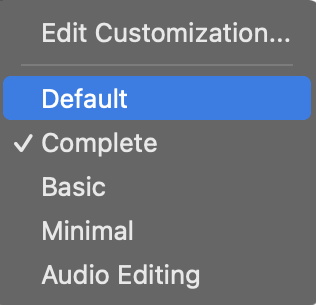
To create a new Customization Setting via the Customization Editor, navigate to View/Customization/Edit Customization.
To recall an existing Customization Setting, choose it from the list.
Note that Customization is only available for the Session Page.
You can also open the Customization Editor by right-clicking on an area you wish to customize (Toolbar, Inspector, Transport, or Browser) and selecting "Customize…" from the context menu.
Customization Edit Window
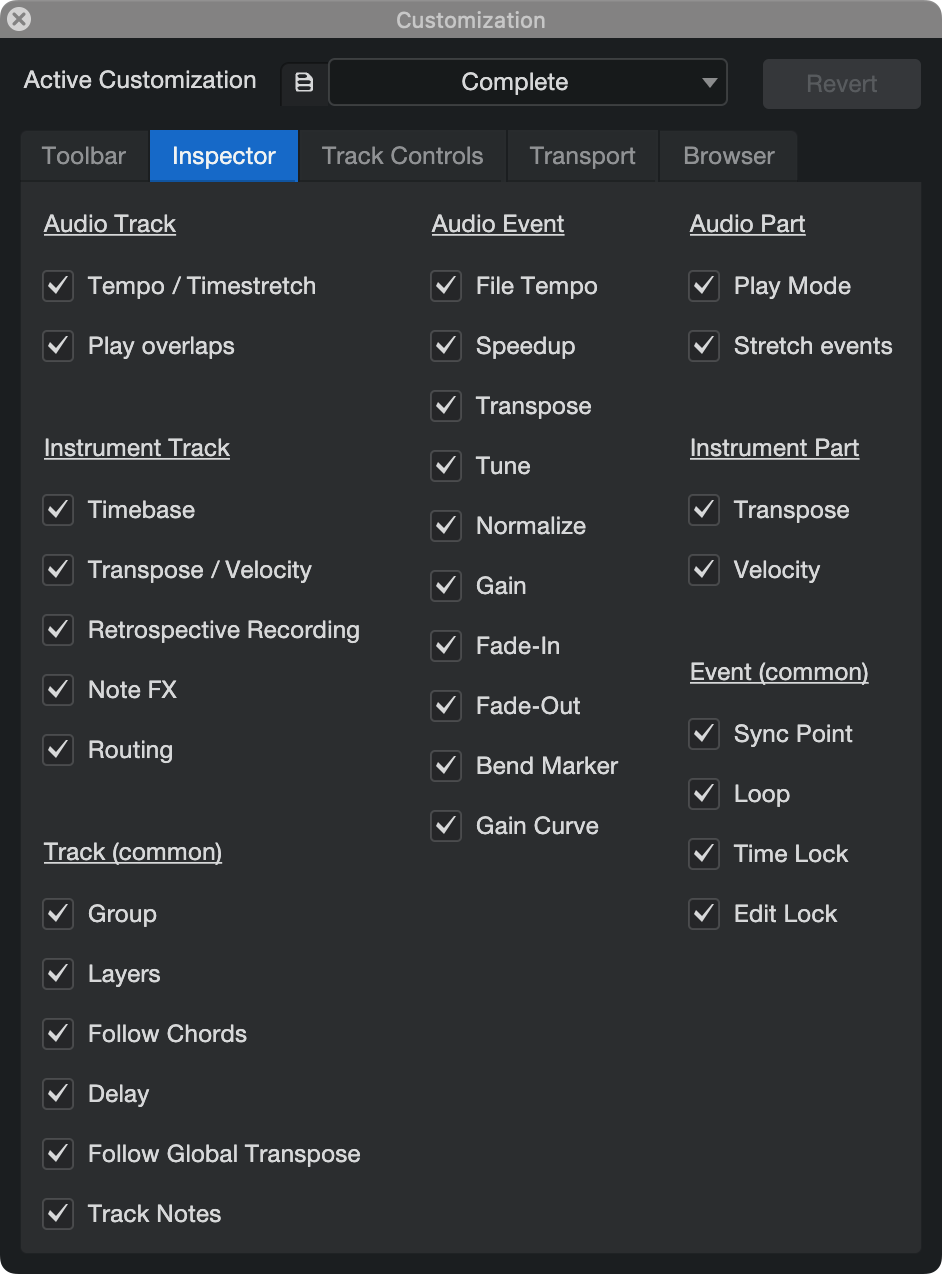
The four tabs across the top of the Customization Edit Window allow you to select which area of Fender Studio Pro you wish to customize. Check or un-check the boxes to toggle the visibility of the desired features. Any change made immediately is stored in user Settings. If a factory Setting was selected, a new user Setting is generated based on the factory Setting name.
- Toolbar: The toolbar at the top of Fender Studio Pro’s Arrange Window.
- Inspector: The Track Inspector located on the left of the Arrange Window.
-
Track Controls: The Track Controls located on the left of the Arrange Window.
- Transport: The Transport interface at the bottom of Fender Studio Pro.
- Browser: The Browser on the right of Fender Studio Pro.
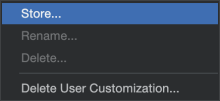
Once you’ve created a Customization Setting, you can save it for later use or to create a starting point for a new Setting. Use the drop-down menu at the top of the Customization Edit Window and select "Store..." From here, you can also Rename and Delete existing Settings.
Choose "Delete User Customization" to restore all Customization Settings to their factory defaults. Note that this will remove any Settings you have created yourself!
The Appearance (color) preferences are available in the General Options menu.
Reverting or Keeping Customization Presets
When loading a Document that has had a Customization Preset applied from a Smart Template via the Apply Preset checkbox, you may be asked to Keep or Revert the Customization Preset if it is different than the one you are currently using.
-
Choose Keep to use the Preset chosen when the Document was created.
-
Choose Revert to use the previously selected Preset.